PeterBilt 379/389 Breather LED Glow Light Kit
Make Your Pete's Breather 'Glow' with our 144 LED Light Kit!
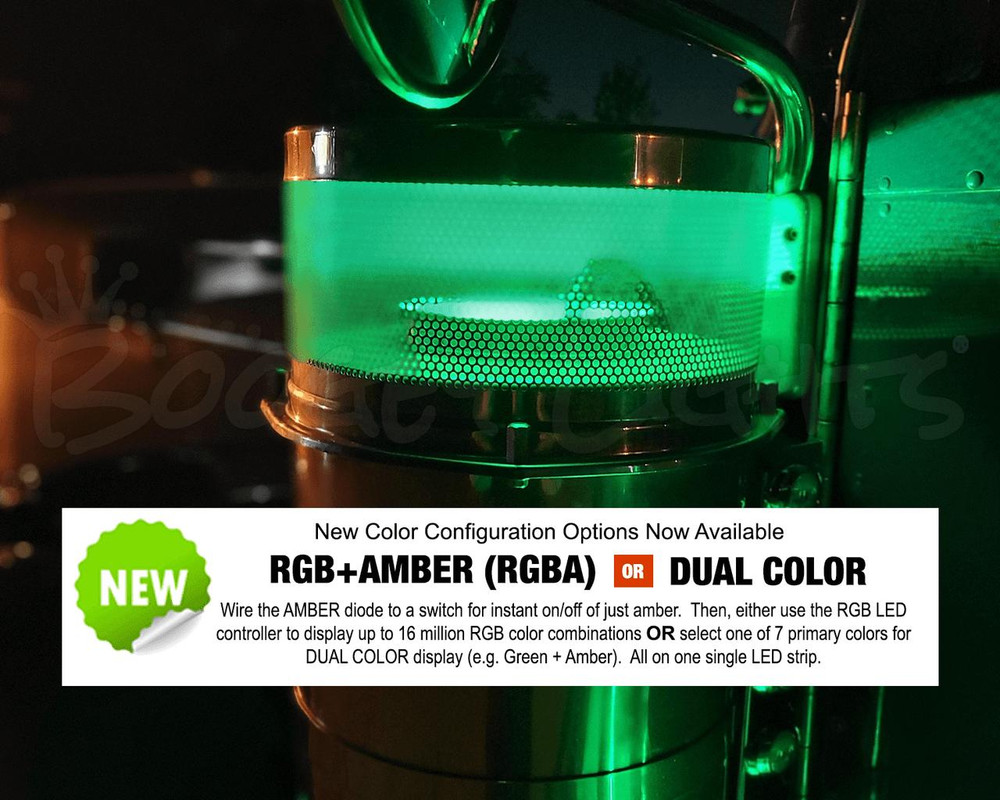
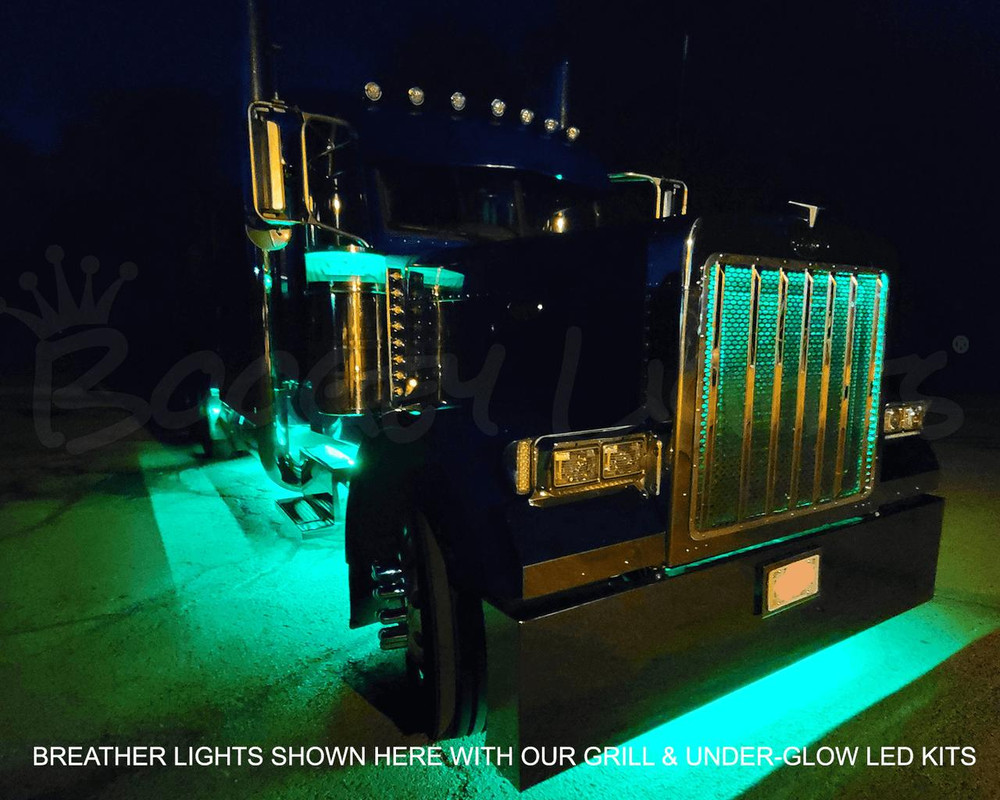
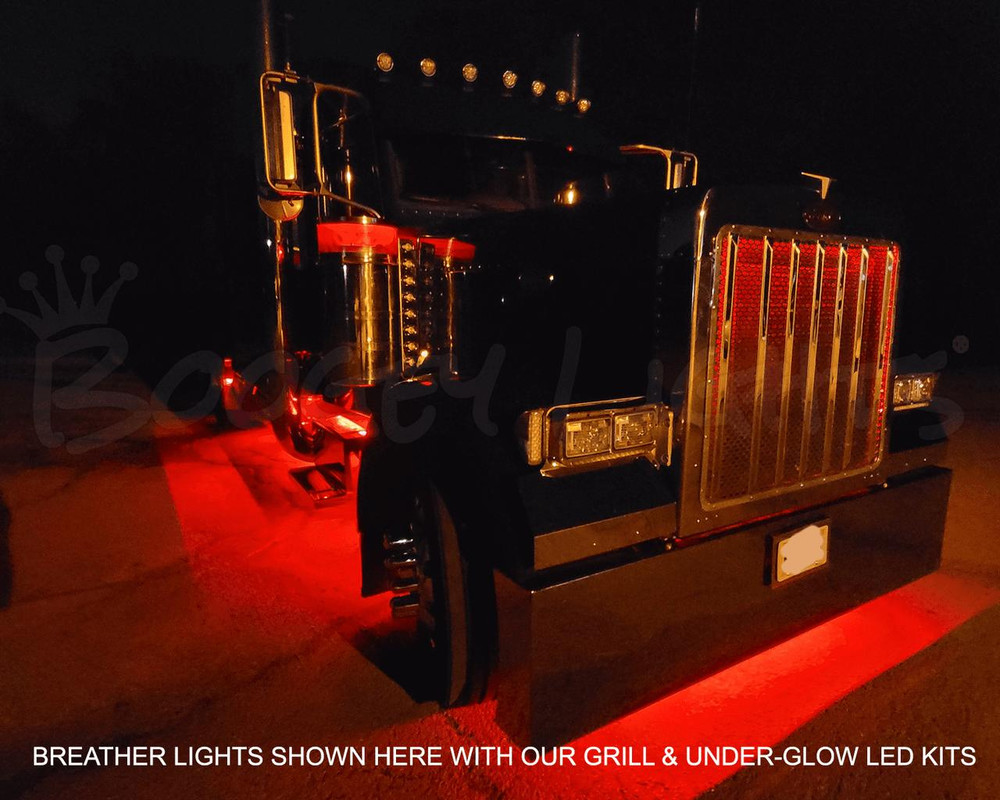
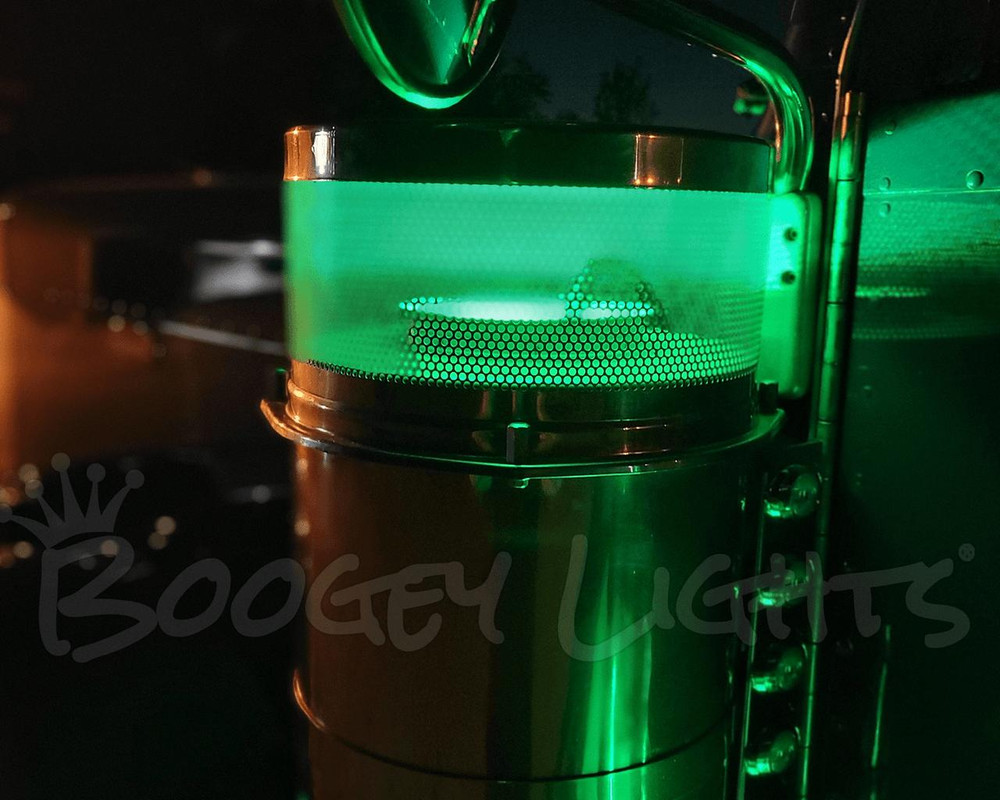
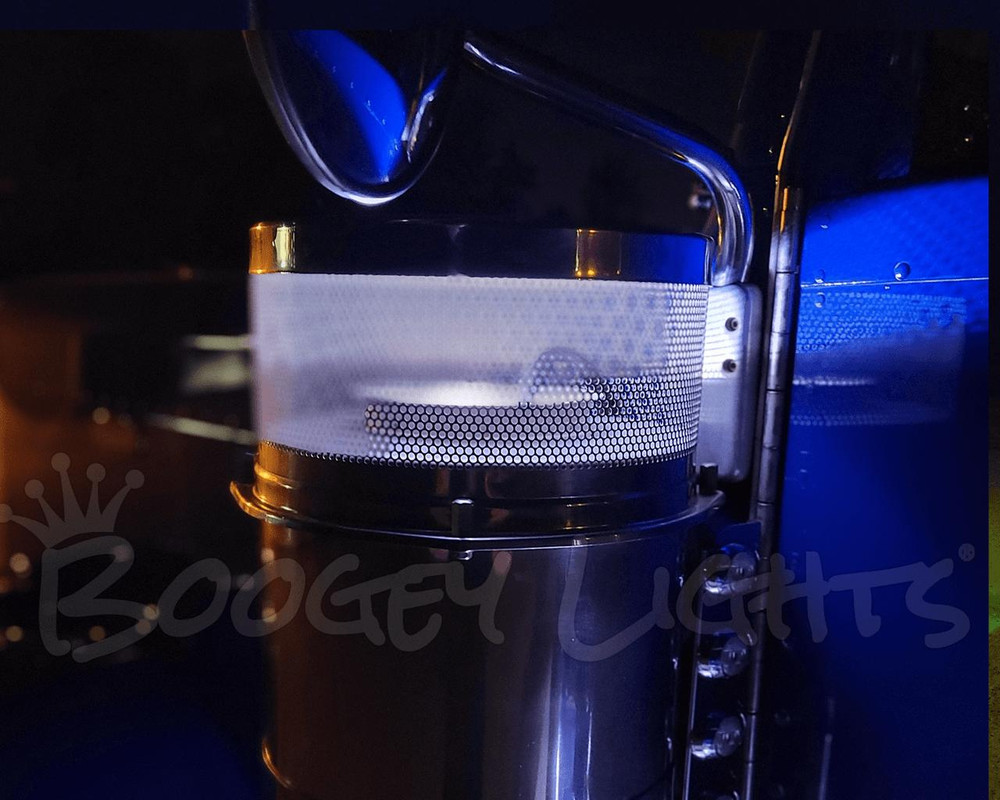
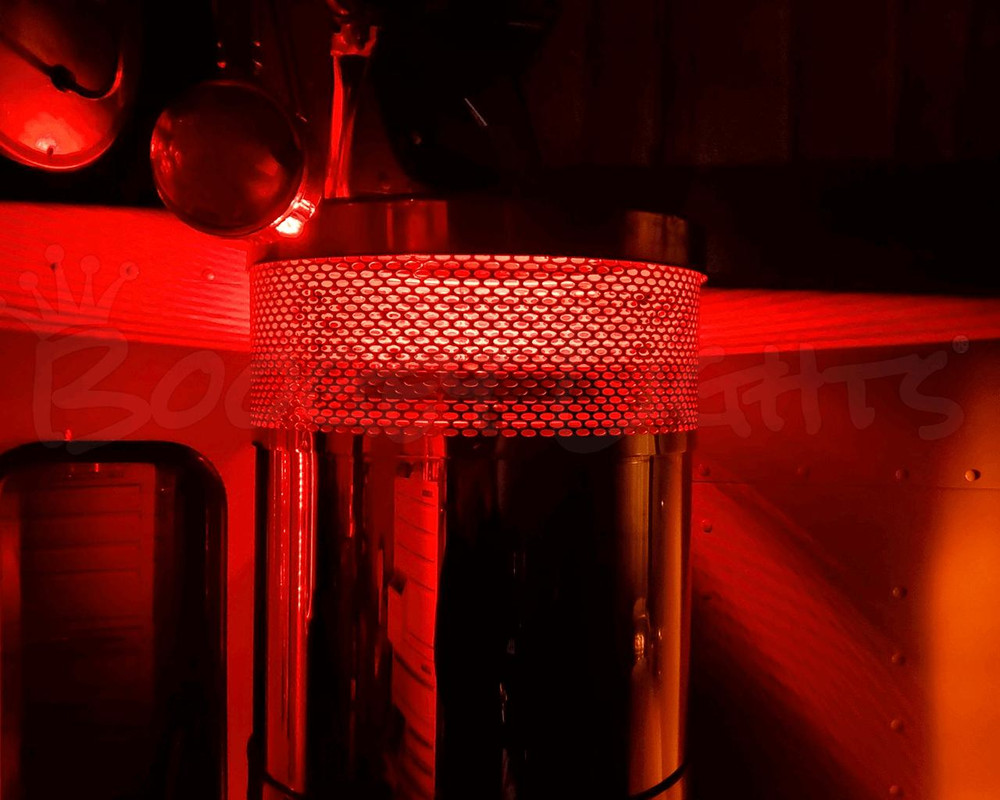
Light up your breather with our super-bright LED light kit built for the 379 or 389 air cleaner (13" or 15"). Each breather has 72, super-bright LEDs which are hidden inside the intake. It gives the illusion that the breather is glowing (see photos). Offered in multi-color RGB, RGBA, Dual Color (your choice of 7 primary colors + amber) and single color (8 choices) configurations. This kit can also be combined with our GRILL LIGHT KIT and our UNDER-GLOW LIGHT KITs for the 379/389 too. 12vdc.
Unlike most every other light kit out there, these light kits are ACCENT LIGHT KITS. When mounted properly, you'll never see the LED lights themselves. You'll only see the glow from the LEDs. If you're interested in learning more about WHY Boogey Lights are different than any other LED lighting system on the market, click here: WHY BOOGEY LIGHTS . We do a deep dive into the ten differences between Boogey Lights® and all the others.
CONFIGURATIONS
- Stand Alone: Single Color. This is the default configuration. Just the LED light kit for TWO breathers. No switching or battery connection wiring included. Assumes you are going to be wiring the lights into an existing 12vdc circuit or switch. Be sure to allocate additional amperage draw which depending upon the color, can be as much as .75 amps per 72 LEDs.
- Stand Alone: Single Color w/RF Wireless ON/OFF + battery connection wiring. Includes the LED light kit for two breathers (single color) PLUS a wireless on/off RF remote control along with battery connection wiring.
- Dual Color - No switching or battery connection wiring included. Assumes you are going to be wiring the lights into an existing 12vdc circuit with your own switches. Be sure to allocate additional amperage draw which depending upon the color, can be as much as 3.3 amps per 300 LEDs. In all cases we strongly suggest using a heavy duty 30 or 40 AMP automotive relay when wiring Boogey Lights to your existing system.
- Dual Color with one ON/OFF/ON 3 position switch, two relays and battery connection wiring with two 30amp fuse holders.
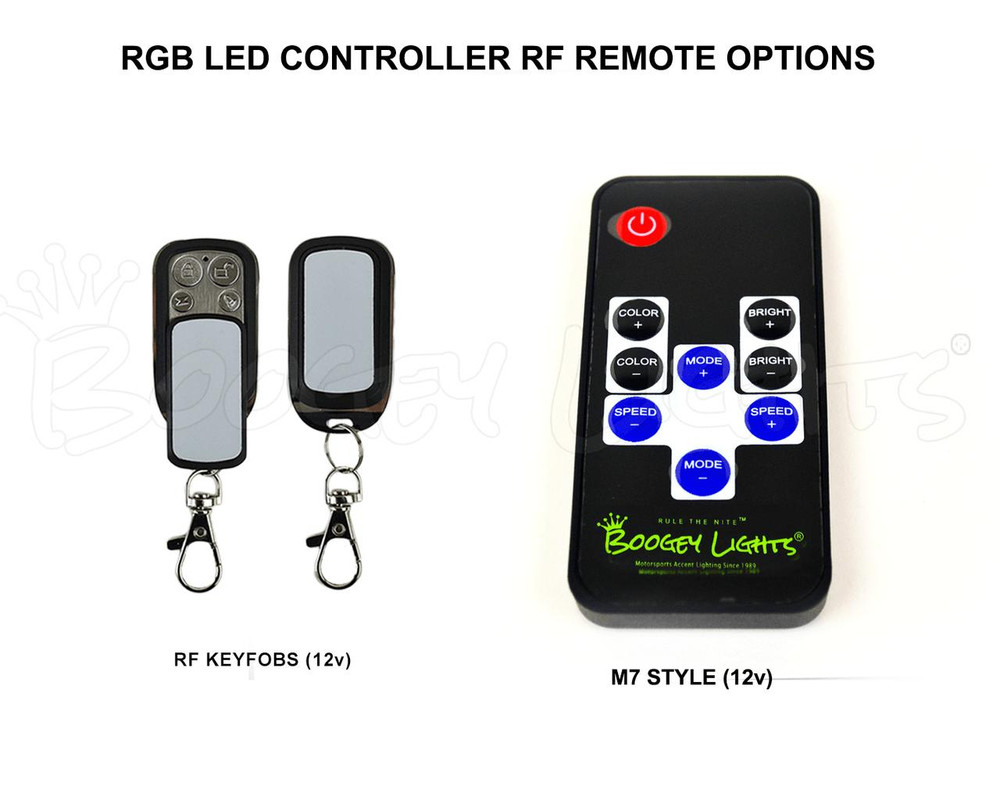
- Stand Alone: Multi-Color / RGB w/Wireless LED Controller + battery connection wiring. Includes the RGB multi-color LED light kit for two breathers PLUS a wireless RF/Bluetooth combo LED controller along with battery connection wiring. NOTE: You have two remote control options here: Key Fob or M7 style remote. The M7 style remote is the most popular because of it's nine large, easy-to-use and see buttons. Each button has one function so no sharing of functions. It measures 3.5" x 1.5" x .25". The KEY FOB style remote is smaller and is key chain ready. It has four smaller buttons each of which have more than one function. The KEY FOB remotes have a sliding cover to protect the keys from damage and are easy to put in your pocket without accidentally pressing any buttons. It measures 1.75" x 1" x .5". See photos.
- Integrate with existing Boogey Lights Under-Glow or Grill Light LED Light Kits (Single Color or Multi-Color). Includes either the Single Color OR RGB multi-color LED light kit for two breathers plus wiring to connect to an existing Boogey Lights Under-Glow or Grill Light LED kit that already has switching and/or LED controller in place.
SINGLE COLOR vs MULTI-COLOR
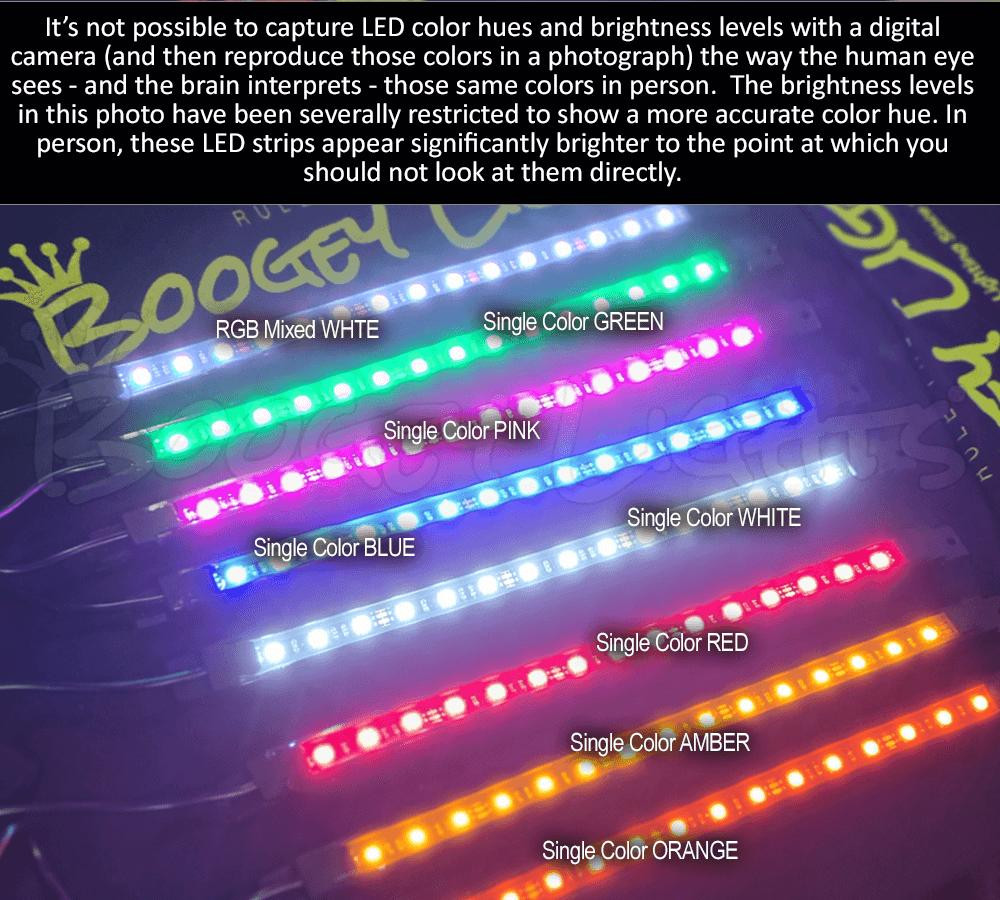
Single colors are going to be brighter than RGB (multi-color) LEDs. The reason is that in an RGB LED there are three diodes: red, green and blue. The LED controller mixes those three colors to create other colors. For example, equal amounts of red + green + blue = white. In a single color LED, all three diodes are the same color. So in a single color white LED, there are three white LEDs which is much brighter than an RGB led mixed to show white. If you're for the absolute brightest color for your truck, go with single color. If however you want to be able to change the colors from time to time, go with RGB. Just be aware that the RGB version of isn't as bright as the single color version.
RGB / Multi-Color: For RGB led lighting an LED Controller is needed to operate the lights. The controller is what operates the lights and mixes the colors. In addition to providing a wireless on/off capability, the LED controllers offered allow you to control your lights with your Bluetooth 4.0 enabled smart phone and our free smart phone APP (Android and IOS) OR the included RF wireless remote. With the included RF remote you can change between 7 colors and functions of on/off, blending, strobbing, breathing, flashing, fading and dimming. You can also use your Bluetooth enabled smart phone to create that custom look with over 16 million different color combinations plus three pre-sets.
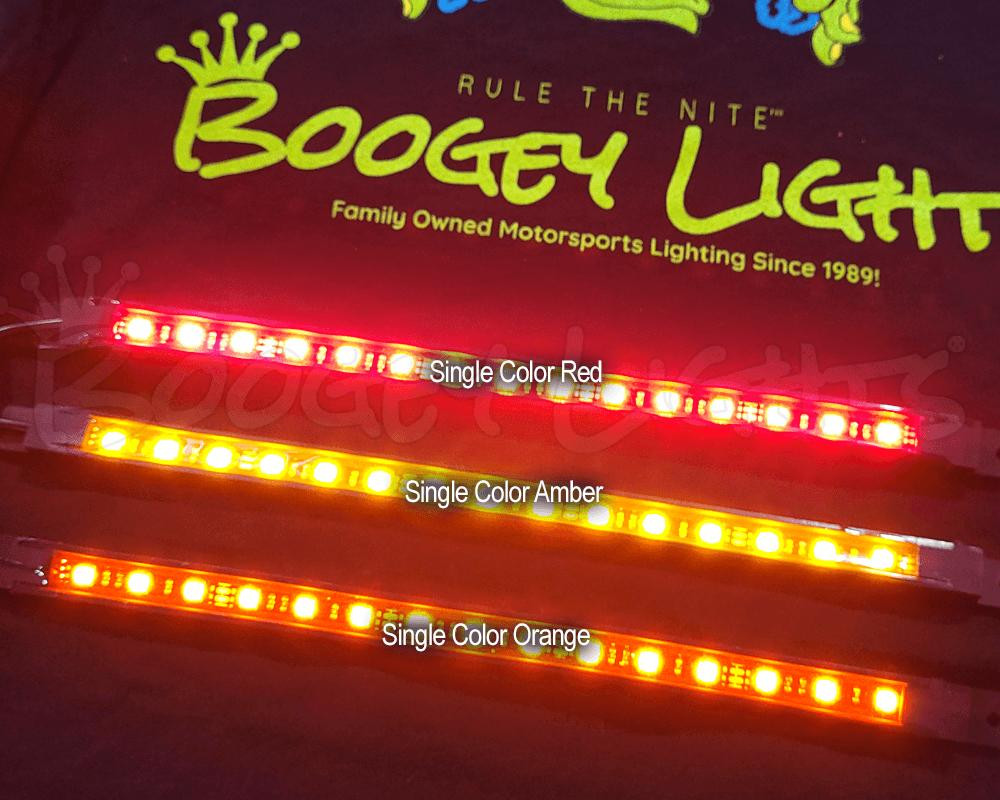
NOTE: If purchasing RGB, be aware that an RGB LED cannot create the color orange. It can come close but not exact. Why? As mentioned previously, RGB leds have three color DIODES: RED, GREEN and BLUE. It's the mixing of these three colors together that create other colors. The color ORANGE is created by mixing RED + YELLOW. The color YELLOW is created by mixing RED + GREEN. With an RGB LED, there is only one RED diode so it can only be used once. To get something that looks more like orange to the human eye using RGB LEDs you need to mix equal amounts of RED + GREEN (actually just a bit less green since the human eye is more sensitive to green wavelengths). This will give you the color YELLOW. Then, increase the intensity of the RED just a little (or, pull back the green). This will essentially add a little red to the yellow to effectively mix a color that has an orange tint which is closer to AMBER. It's not perfect but it's as close as you can get to the color orange using RGB led lights.
If you really like orange but want the flexibility that RGB provides, we suggest using RGBA. RGBA will create a nice rich orange color by mixing equal parts RED and AMBER.
WHAT IS RGB + AMBER (RGBA)?
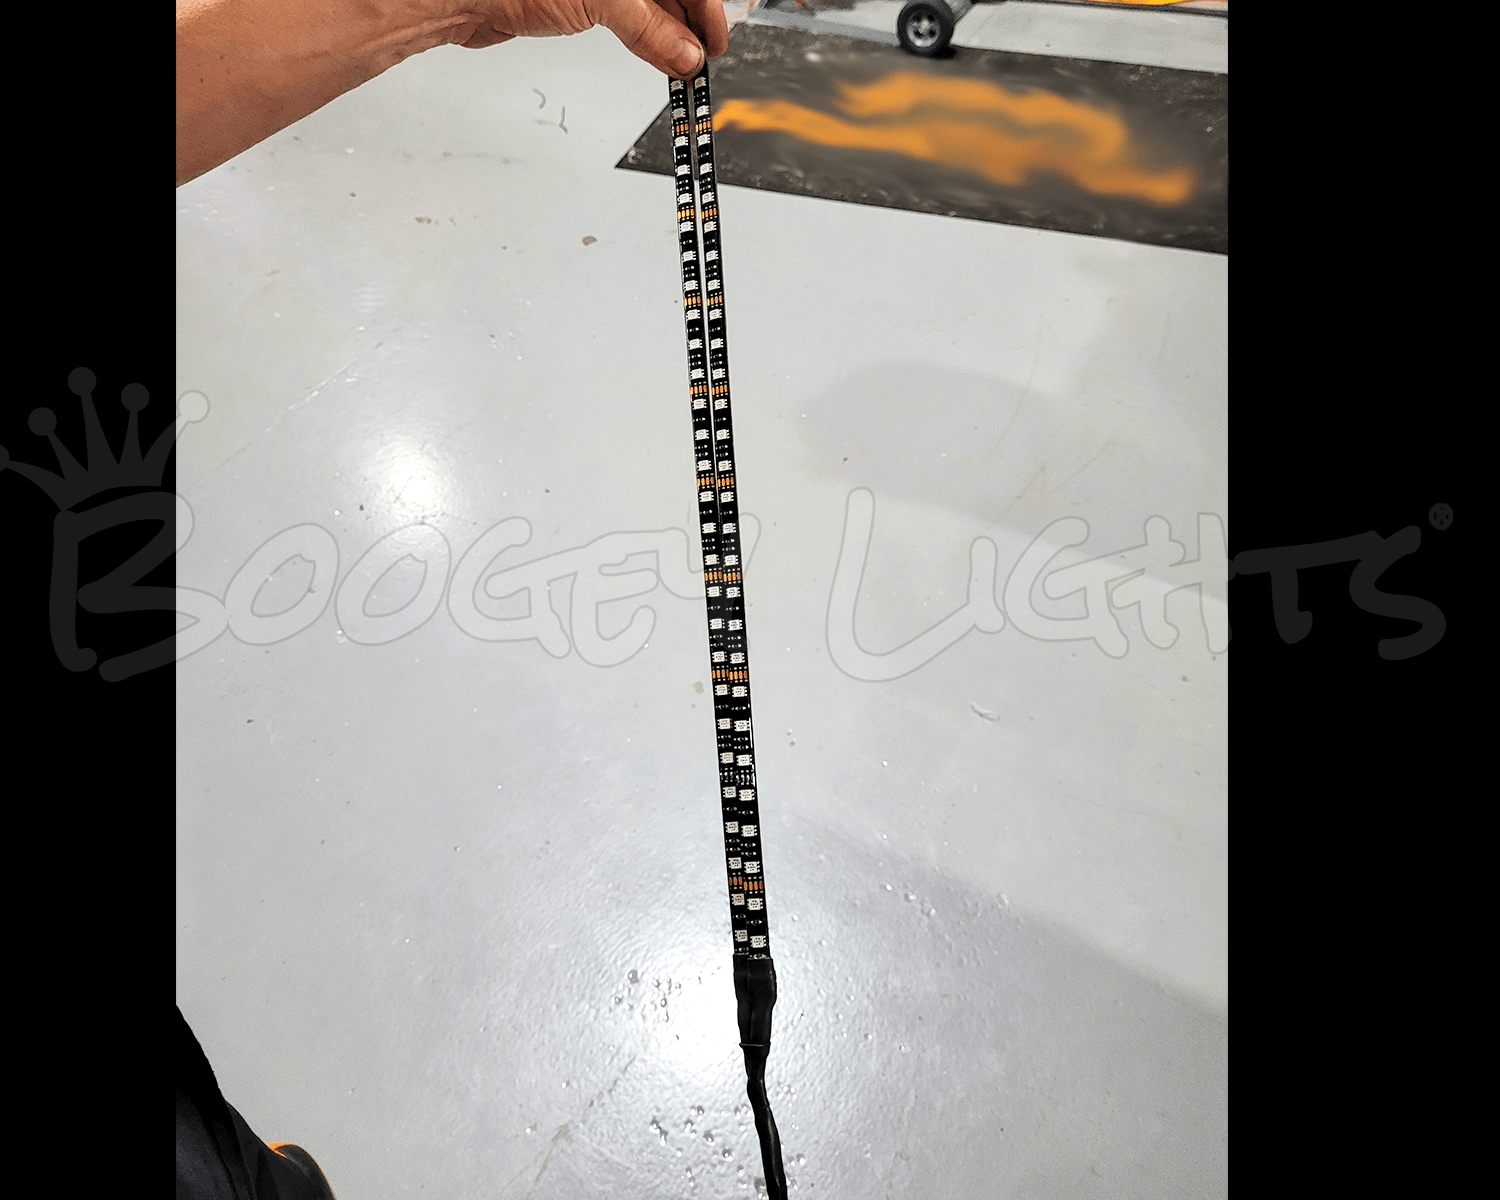
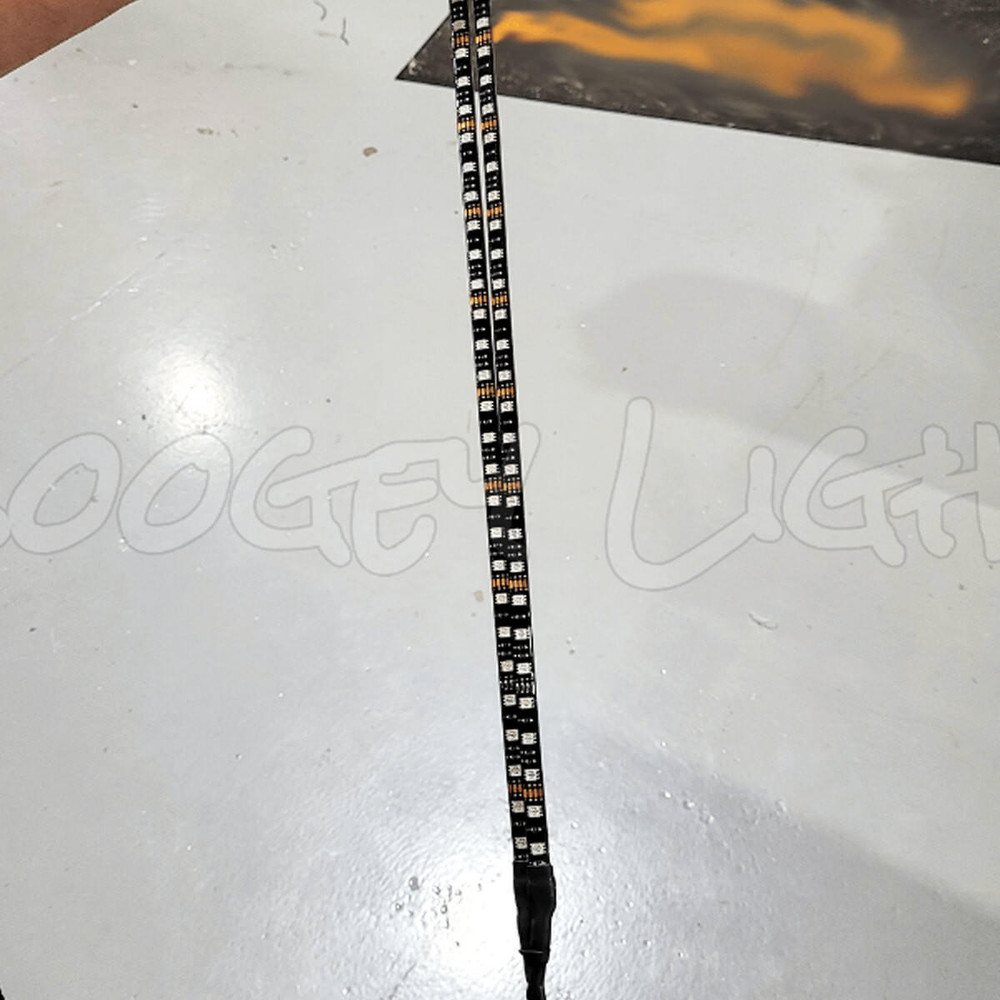
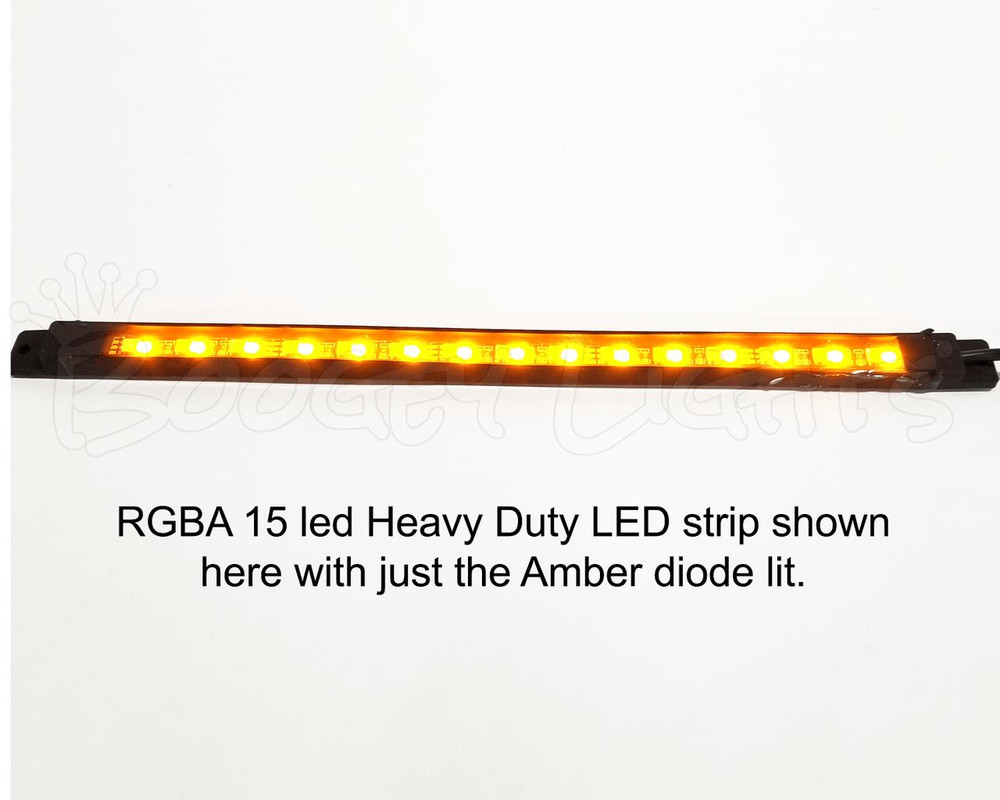
RGBA is a new type of LED strip format Boogey Lights® developed. It is available in both our Low Profile and Heavy Duty LED strip formats. The RGBA led strip includes our core RGB tri-chip technology using a 5050 RGB LED with the addition of a fourth 2835 diode that is AMBER. Designed primarily for motor vehicle applications, that fourth AMBER diode can be wired to a separate switch on the dash (or tied into a relay to work with existing running lights) that allows you to quickly and easily turn on just the AMBER leds. Then, for those who want the flexibility to be able to display up to 16 million color combinations using the RGB tri-chip, they can do that too. RGB + A provides the best of both worlds. Single color amber plus RGB tri-chip multi-color. The product photo carousel of this product page includes a close-up view of the LED strip design and wiring diagram. Note that due to the addition of that fourth diode, the RGBA strips are a little wider than our standard tri-chip RGB and single color LED strips. Also, the power lead wires use five conductor vs four. For additional information including product specs, click the SPECS navigation tab on this product page.
WHAT IS DUAL COLOR?
The Dual Color LED configuration uses our RGBA LED strip but instead of pairing that LED strip with an RGB LED controller (to mix up to 16 million different color combinations), we hard wire a combination of one, two or all three of the RGB diodes (red, green or blue) along with the AMBER diode to two on/off switches. One switch operates the primary color diode(s). The other switch operates the amber diode. There are a total of seven Dual Color configuration options: RED+AMBER, GREEN+AMBER, BLUE+AMBER, MAGENTA+AMBER, YELLOW+AMBER, CYAN+AMBER, WHITE+AMBER. With a Dual Color configuration you don't need an LED Controller. Instead, you only need two switches (and relays); one to control each color. The primary color is chosen from the available dual color drop down list. The secondary color is always amber.
USING 3M ADHESION PRIMER
To achieve the full adhesive strength of the 3M® tape affixed to the back of each strip 3M® Adhesion Promoter (aka Primer) must be applied to the mounting surface first. This is an important step to ensure a secure bond. The 3M® Adhesion Promoter creates a chemical bond between the tape and the mounting surface such that the LED strip will stay stuck (at least until you decide you want to remove it). Using any other solvent such as rubbing alcohol or acetone is not the same thing as using 3M® Adhesion Promoter. While these solvents will help clean the surface, they do not prime the surface. There is a difference. 3M® Adhesion Promoter is included with this kit although you may elect to purchase more if you'd like.
IMPORTANT NOTE ON UV/PURPLE LEDS
True purple LED's are actually ultra-violet (UV). They produce a soft, pleasant purple glow particularly when used on or near shiney reflective surfaces (e.g. chrome motorcycle engines). The color however is not a real bright effect like you'll get with any of the other LED single colors. If you want a subtle, purple glow that looks great, then the UV/LED's may well be for you. If however you want the brightest lights possible, you will not be happy with UV/Purple. We do not recommend UV Purple for Semi-Truck applications for this very reason. The alternative to UV/Purple is MAGENTA (some call it a 'hot purple') which looks similar but has a brighter, pinkish tint. Magenta is available by mixing 100% RED + 100% BLUE which is what our single color Magenta is. You can also mix magenta using our RGB LEDs and an LED controller. Scroll through the photo carousel of this product to see an example of how the MAGENTA looks on a truck when installed. You can also click on the SPECIFICATIONS tab of this product page and scroll down to see photos of all color options.
Will Boogey Lights® Work with Other Brands?
The short answer is probably not. All Boogey Lights® RGB LED strips are COMMON CATHODE LEDS. They share a common ground and will only work with positively switched controllers. Most LED strips on the market today are COMMON ANODE because the controller technology used to power them is less expensive to manufacture. However they're not nearly as bright and are an overall inferior design when compared with COMMON CATHODE LEDs. For more information, click the button below.
Installation
Installation takes about an hour per breather. You can download the Installation Manual directly from our website to get an idea of what's involved. Here are the basic steps.
- Remove the top of the breather. There are usually 4 bolts. Take the top of the breather to a workbench or flat surface where it's easier to work on it.
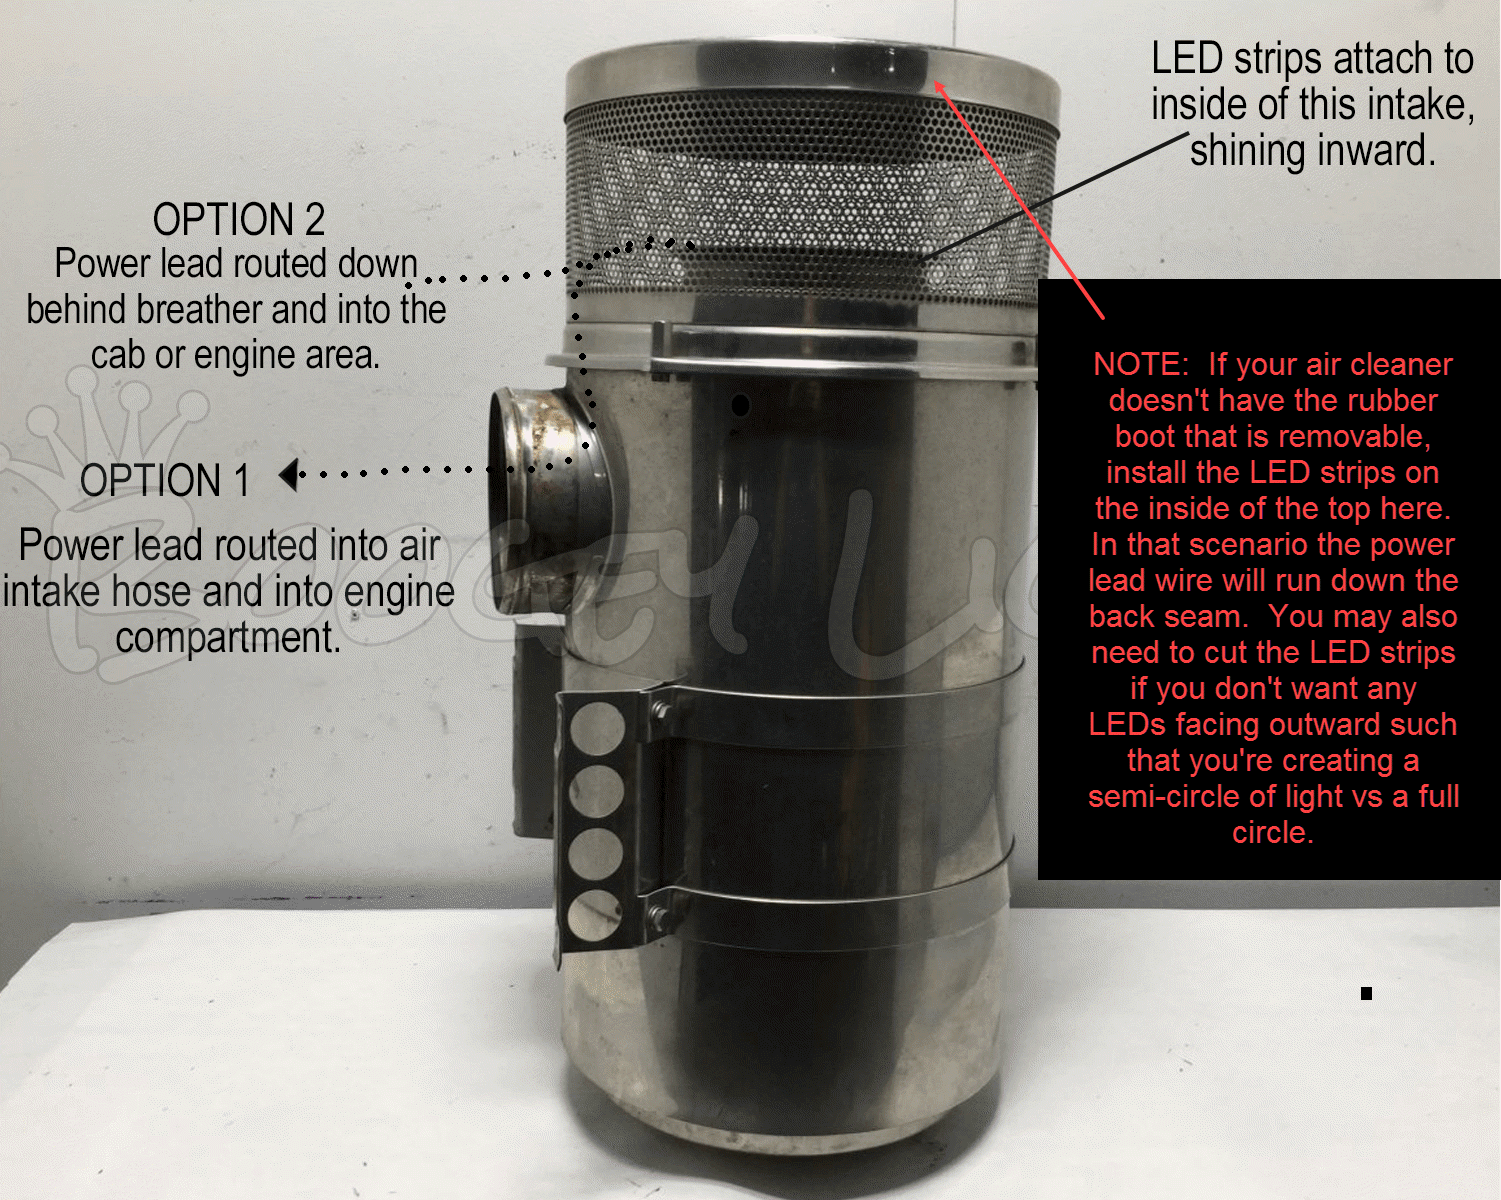
- Determine how you're going to run the power lead that attaches to the LED strip from inside the breather top and into the engine compartment. There are two ways you can run the power lead from inside the breather top into the engine compartment where you'll make your electrical connections (or, connect to an existing Boogey Lights light kit already installed).
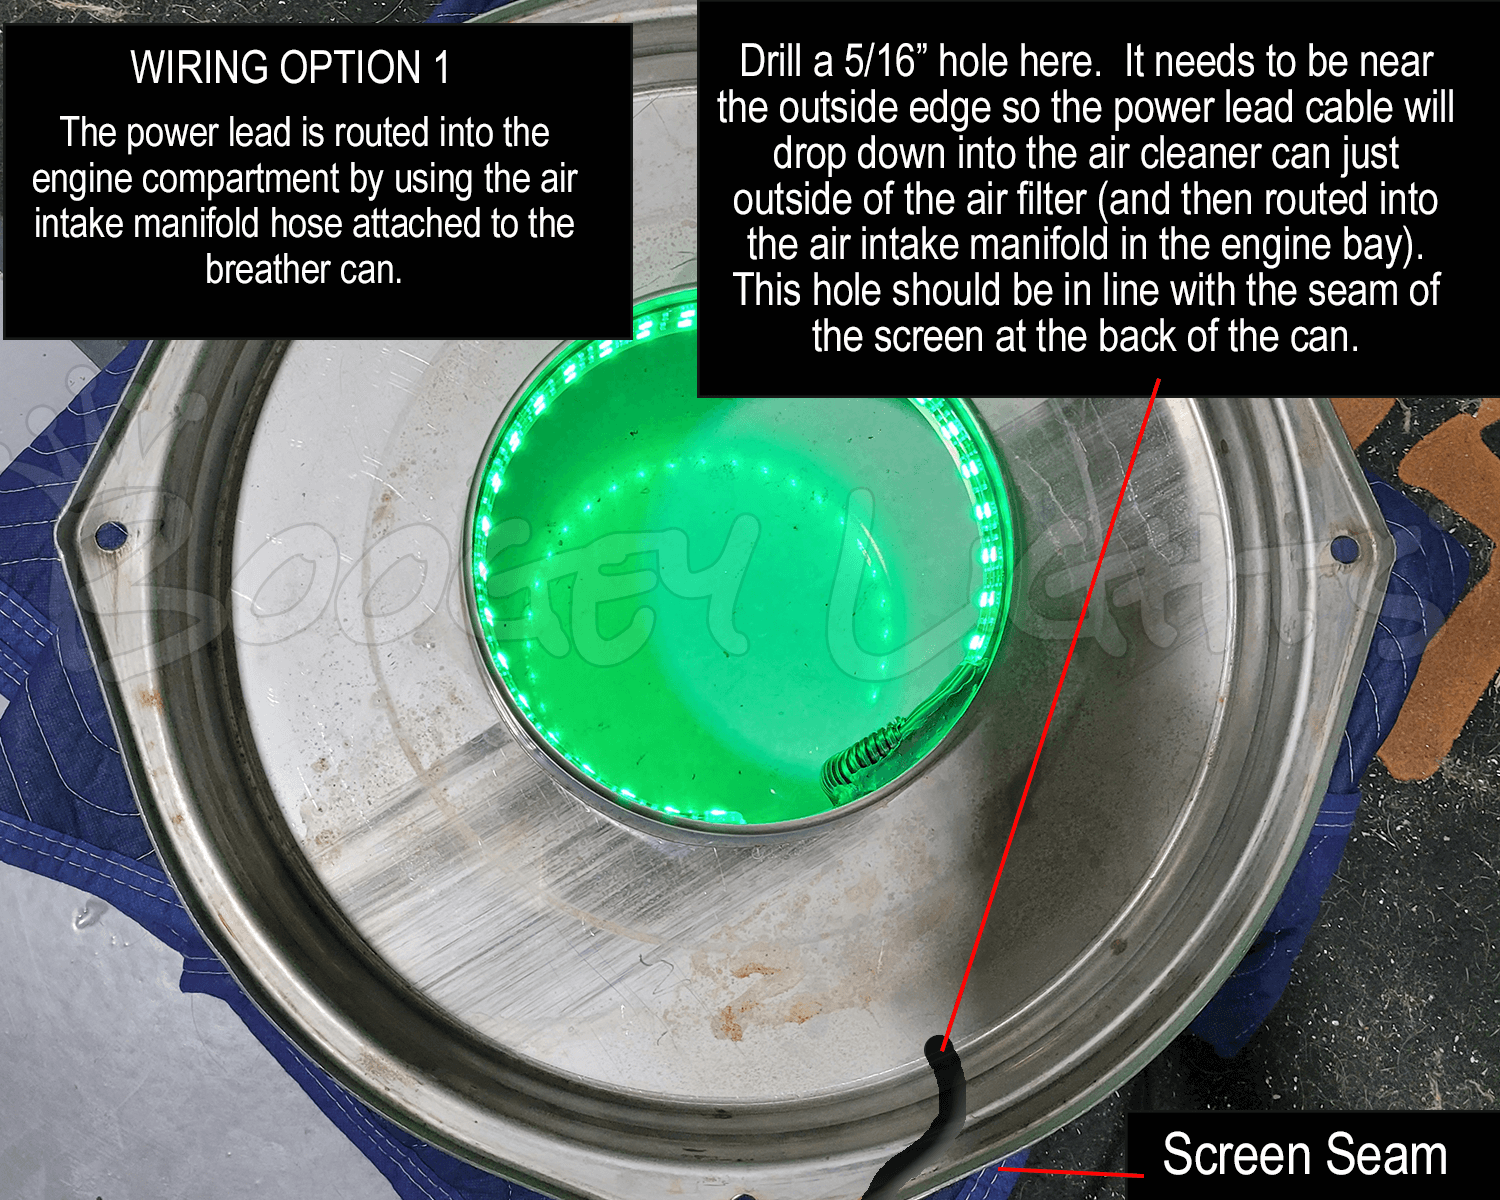
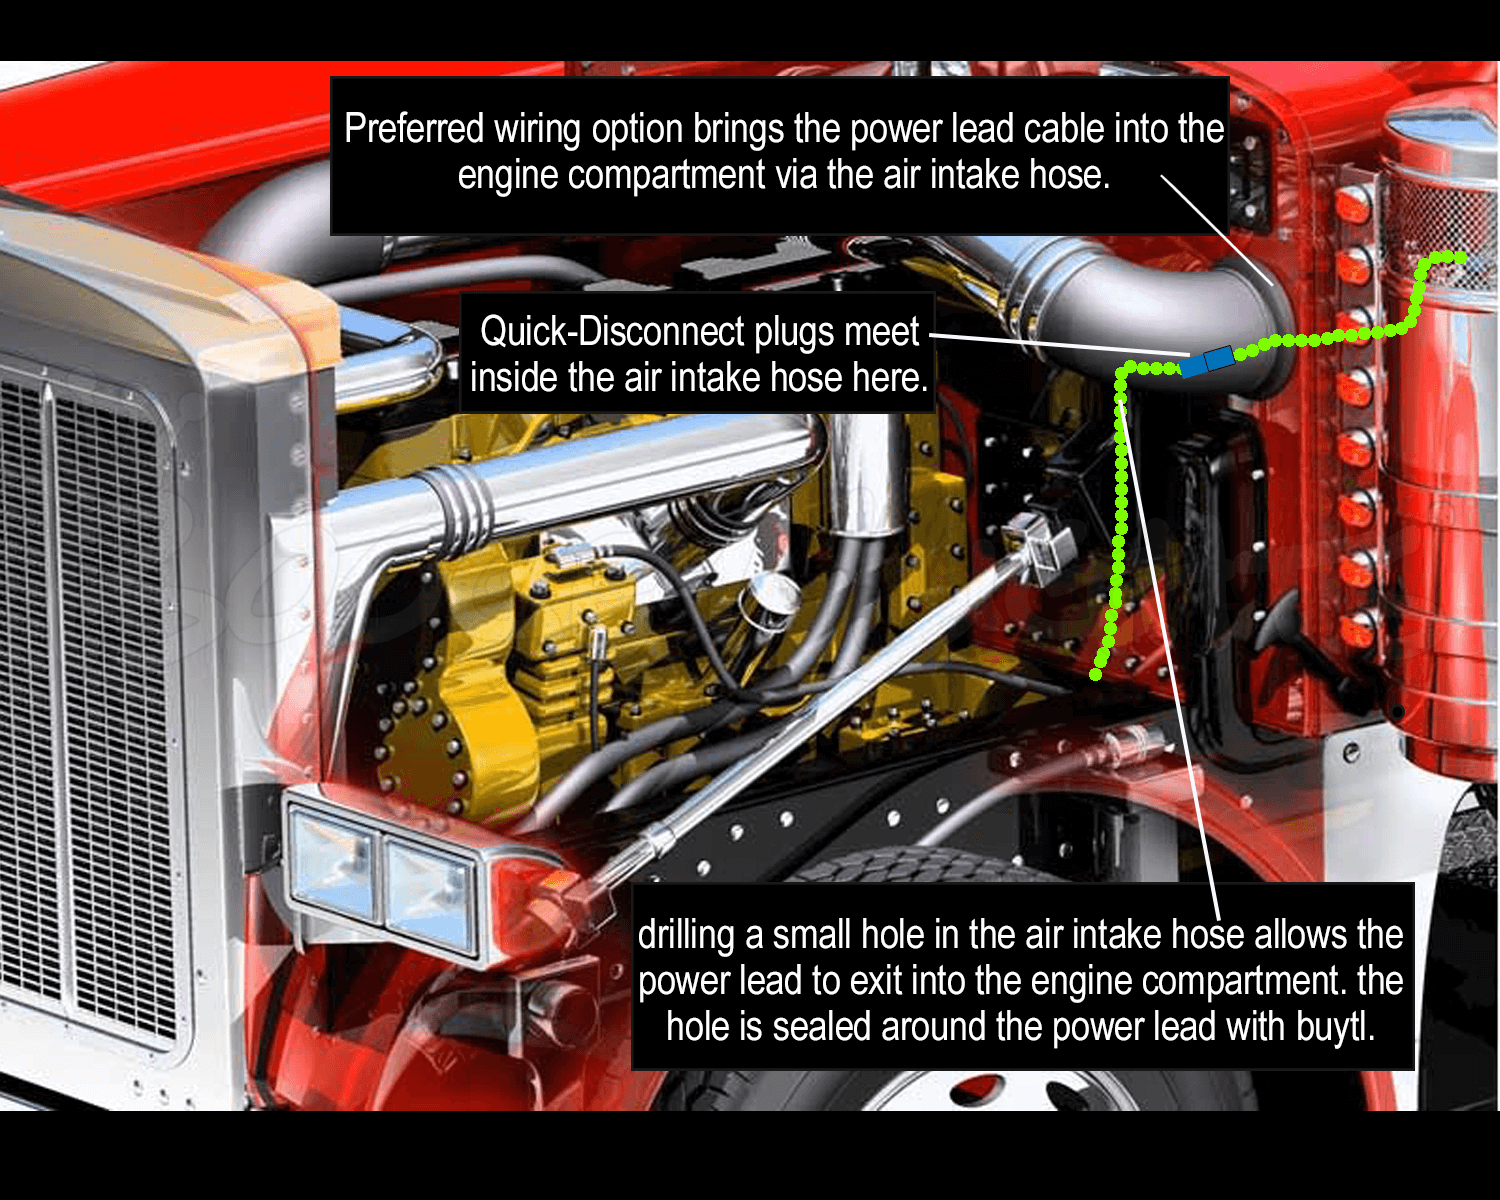
The first way is to route the power lead down into the air intake manifold hose that connects the breather to the engine and then exit that intake manifold hose once inside the engine compartment. We find this to be the easiest and cleanest since it doesn't require removing the entire breather can from the truck. It might not however always be that way depending upon your truck.
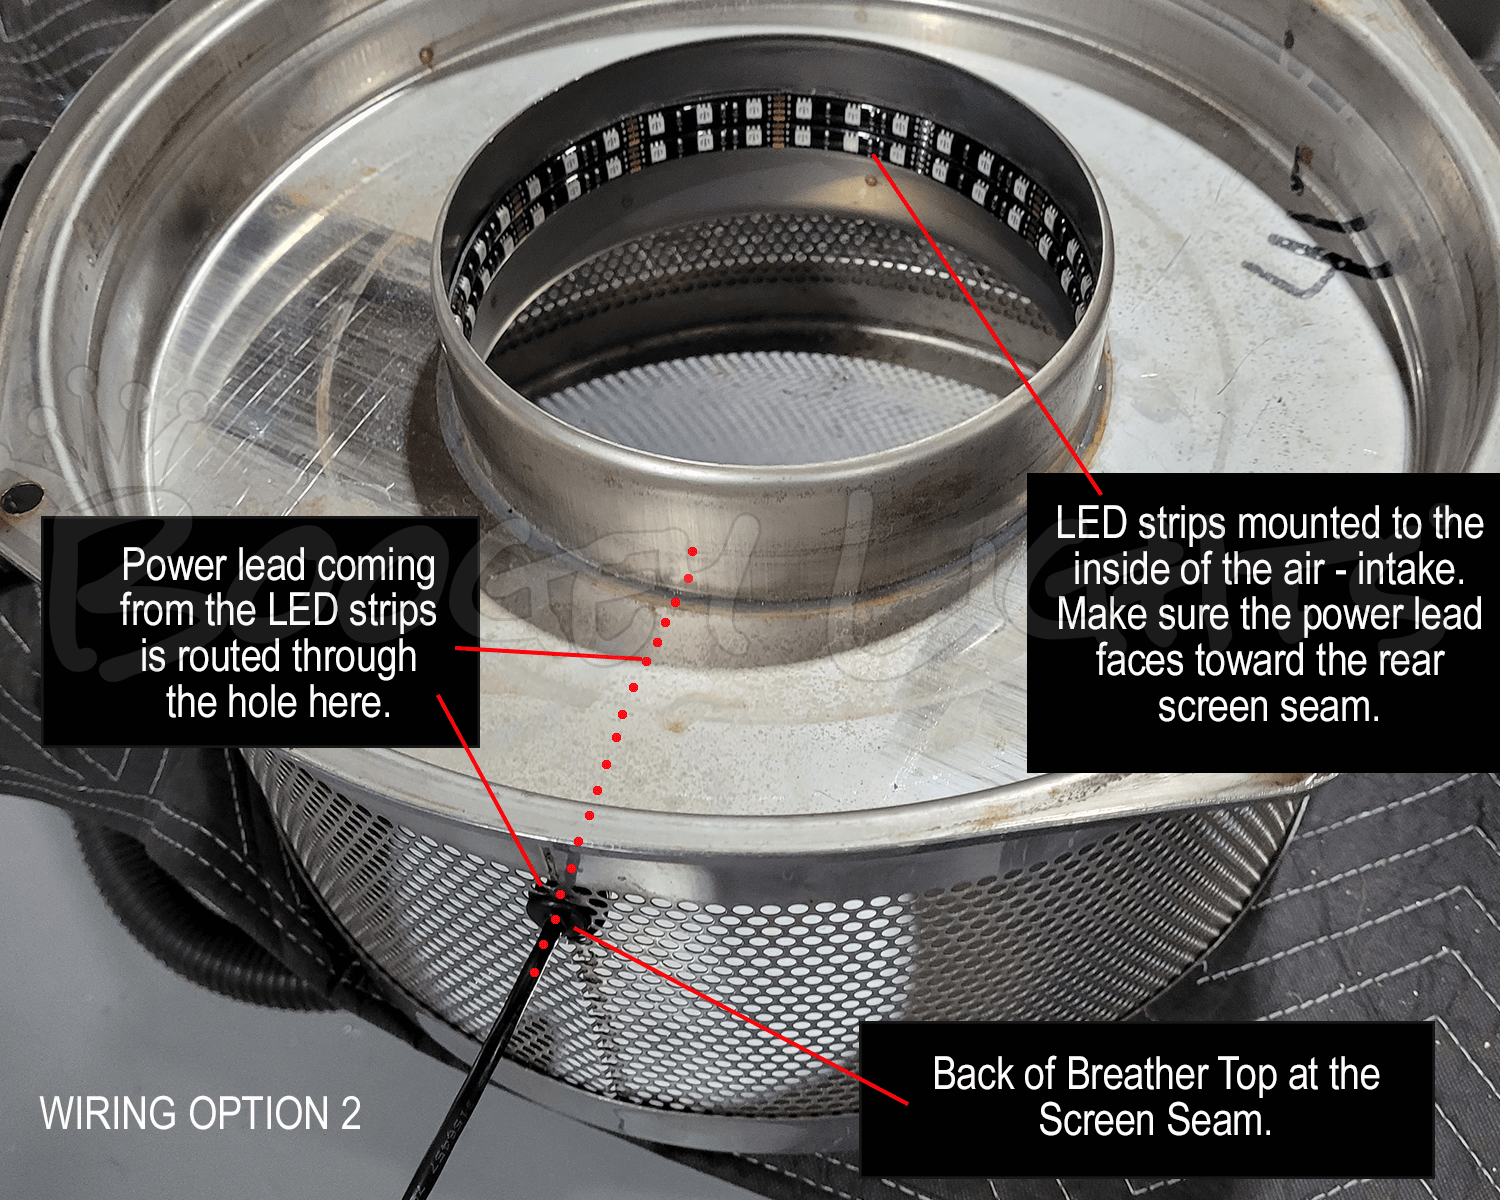
The second option is to route the power lead out of the back of the top of the breather. This is done by drilling a hole through the screen mesh at the back of the breather top at the seam and then routing the power lead through an existing hole in the truck behind the breather and either into the cab area or the engine compartment. This option may require removing the entire breather can from the truck to gain access to a suitable access hole.
Once you've determined which method of routing the power lead cable you're going to use, you'll need to either drill a 5/16" hole into the base of the breather top (see photo) for wiring option one OR into the screen seam for wiring option two (see photo).
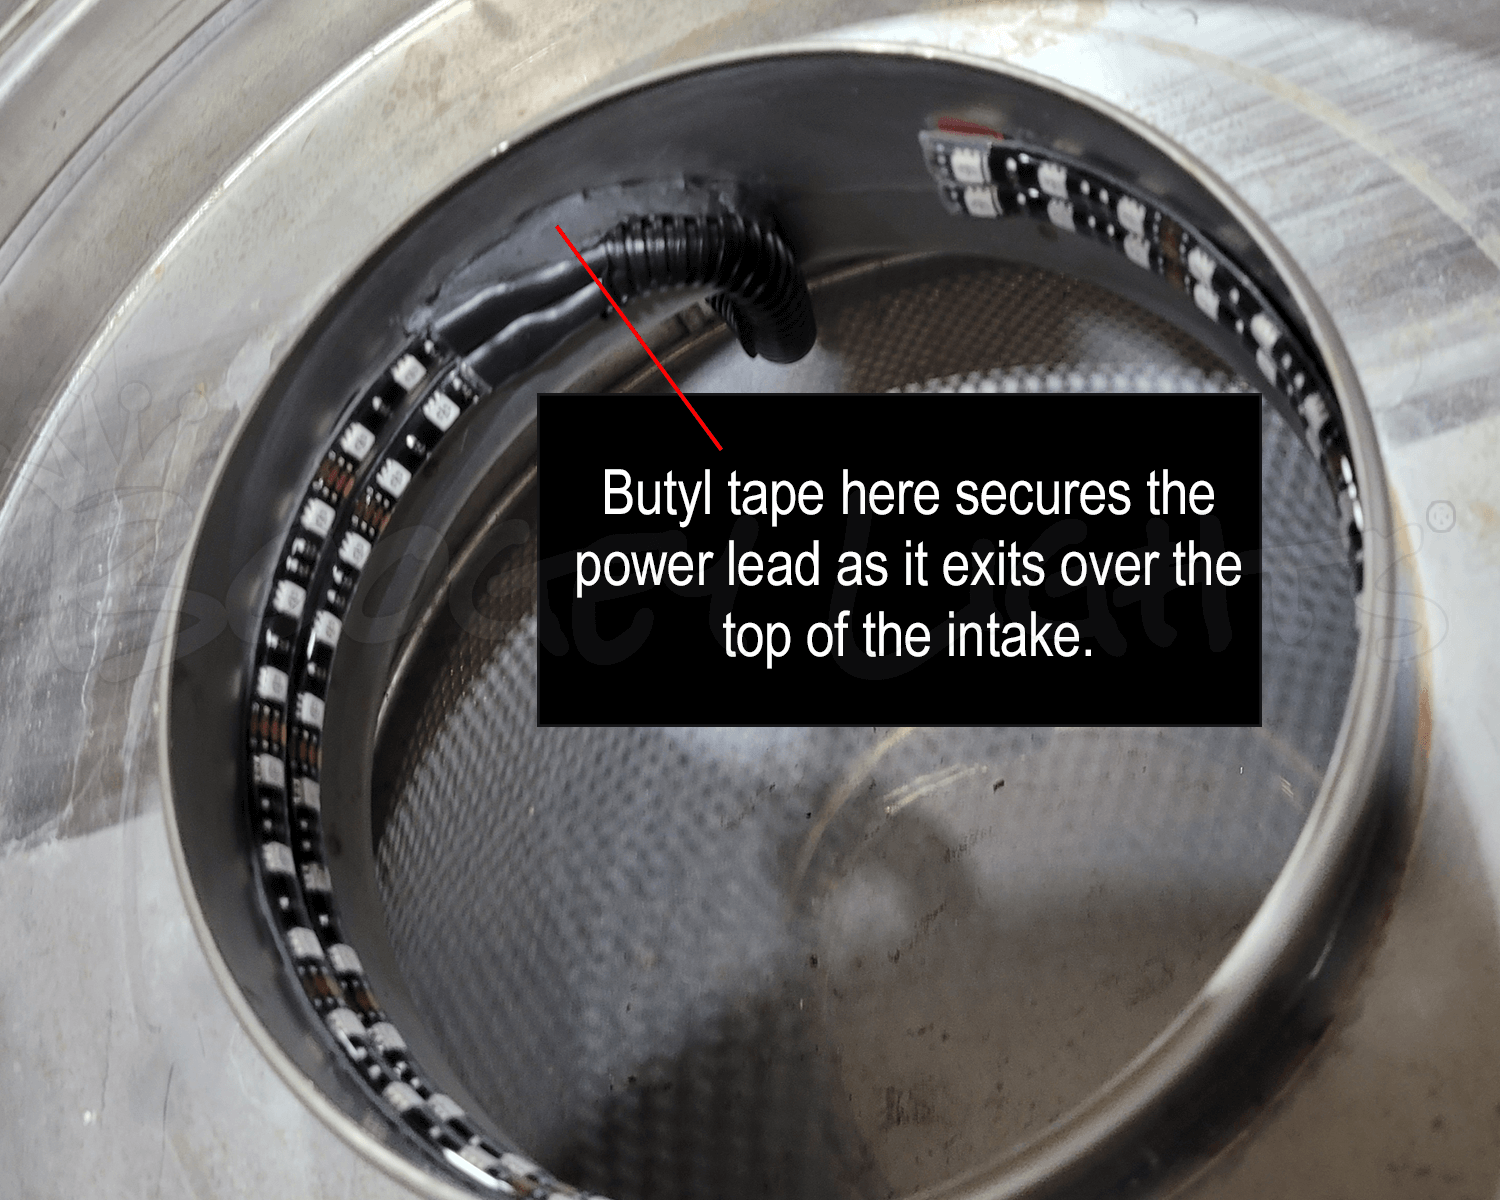
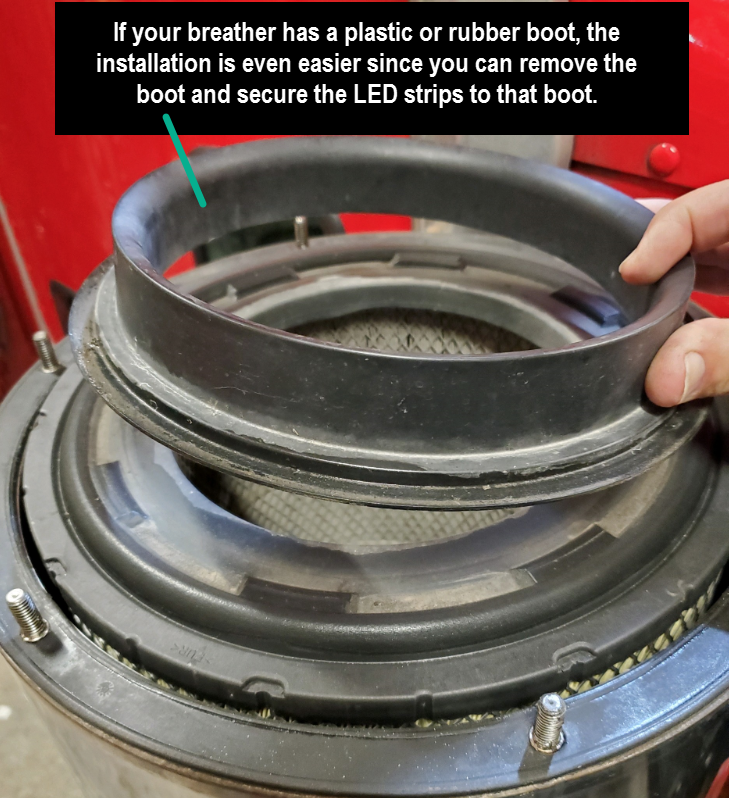
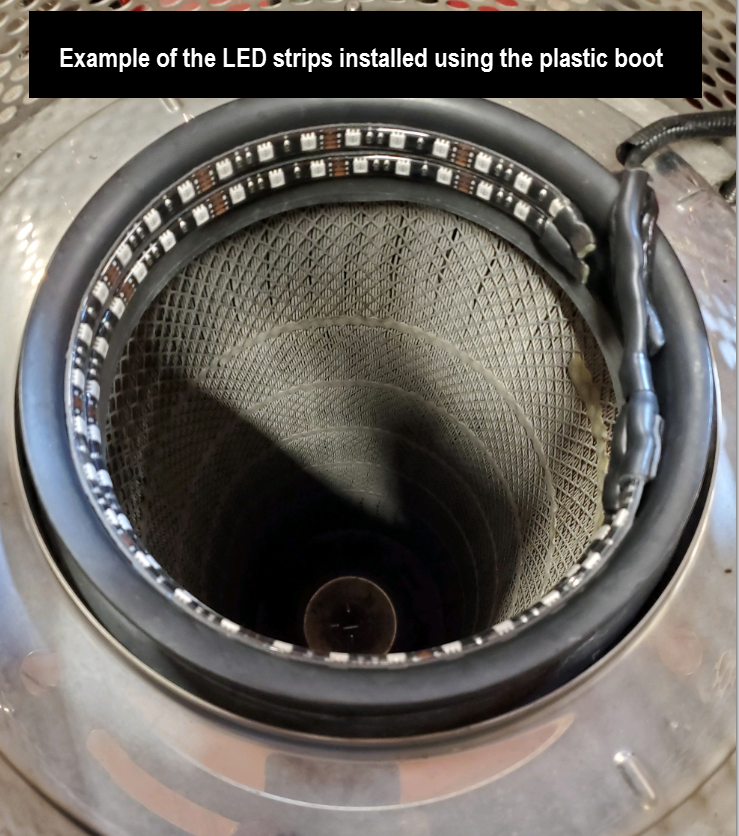
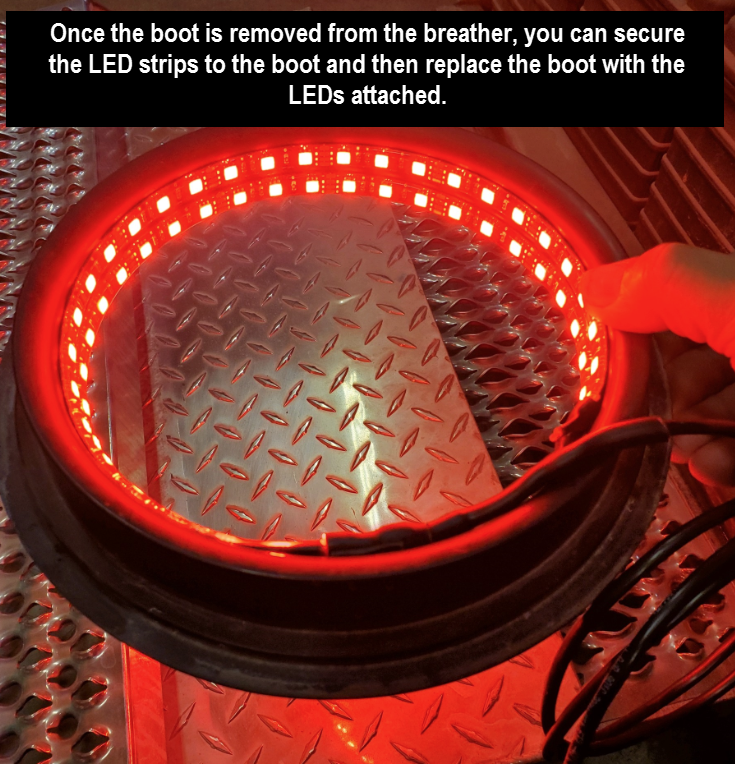
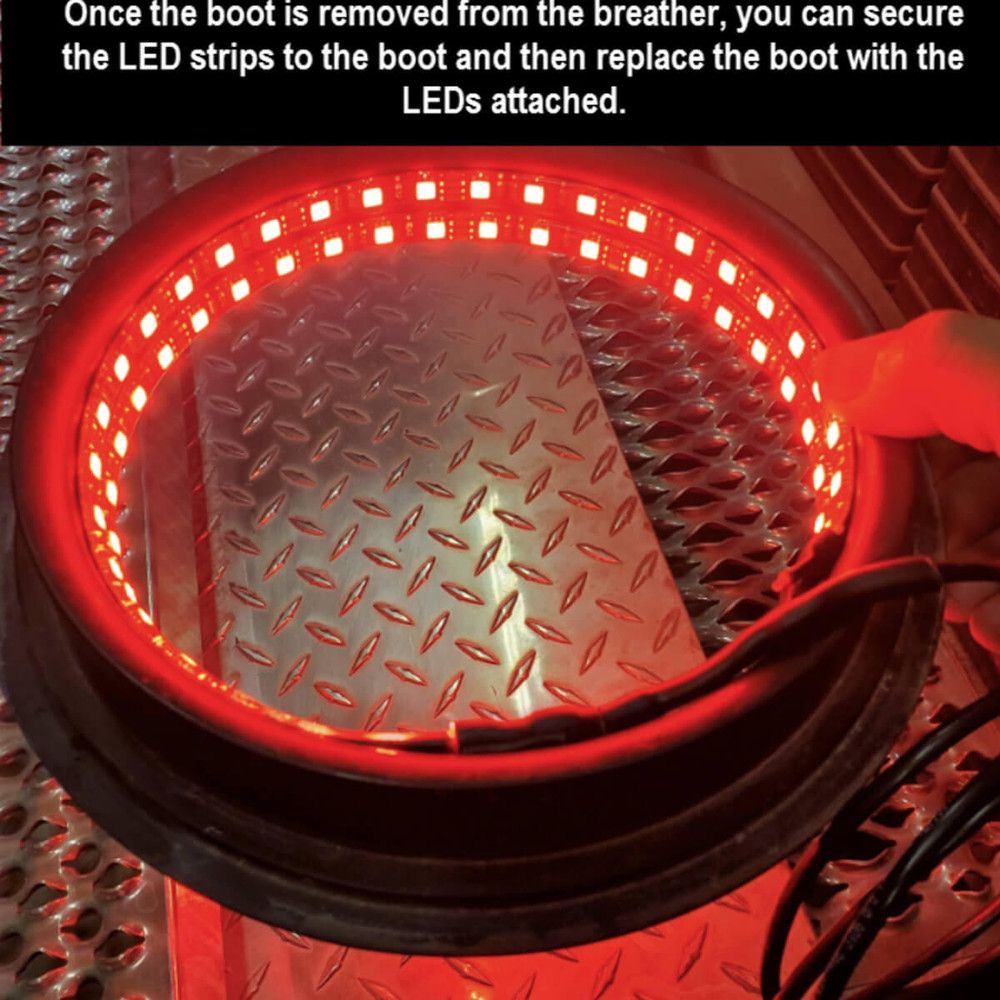
NOTE ON BREATHER CONSTRUCTION: Ideally you want to mount the LED strips to the inside of the rubber boot that fits over top of the filter. If that's not possible, mount them to the inside of the top of breather. We prefer the rubber boot option because it completely hides the LEDs. You only see the glow. If your breather however has a one piece boot/filter, that's not possible since you'd have to replace the LEDs every time you changed out the filter. In that scenario mount them to the inside of the top of the breather. The LEDs are designed to make a full circle of light. In some cases you may want but those LED strips such that you only have a semi-circle of light with the LEDs mounted in such a way that they face inward toward the truck (vs outward toward other drivers). - Clean the LED mounting surface with rubbing alcohol and then apply the 3M Adhesion Primer. At this point you can mount the LED strips. Make sure you plan the layout such that the power lead points toward the rear of the breather. Use the supplied Butyl tape to secure the power lead firmly against the breather top (see photo).
- Route the power lead wire through the hole you drilled in the breather top. Once you have the power lead through the hole, you can wire in the supplied male end of the quick disconnect plug. Important that the breather top be able to be removed easily for service with the LEDs installed inside. . Installing the quick-disconnect plug does that. We suggest allowing 12" to 18"of slack in the power lead cable so you have some room to work; but not too much that you have to coil up excess cable inside the air intake hose. The female end of the quick-disconnect plug needs to be wired to the included feeder cable with the opposite end going through the hole you'll drill in the intake hose inside the engine compartment (see photo). The male and female quick-disconnect plugs will connect together inside the air intake hose just inside the engine compartment.
- Once you have the power lead cable in the engine compartment, you can continue with wiring the LEDs to power and/or a switch.
