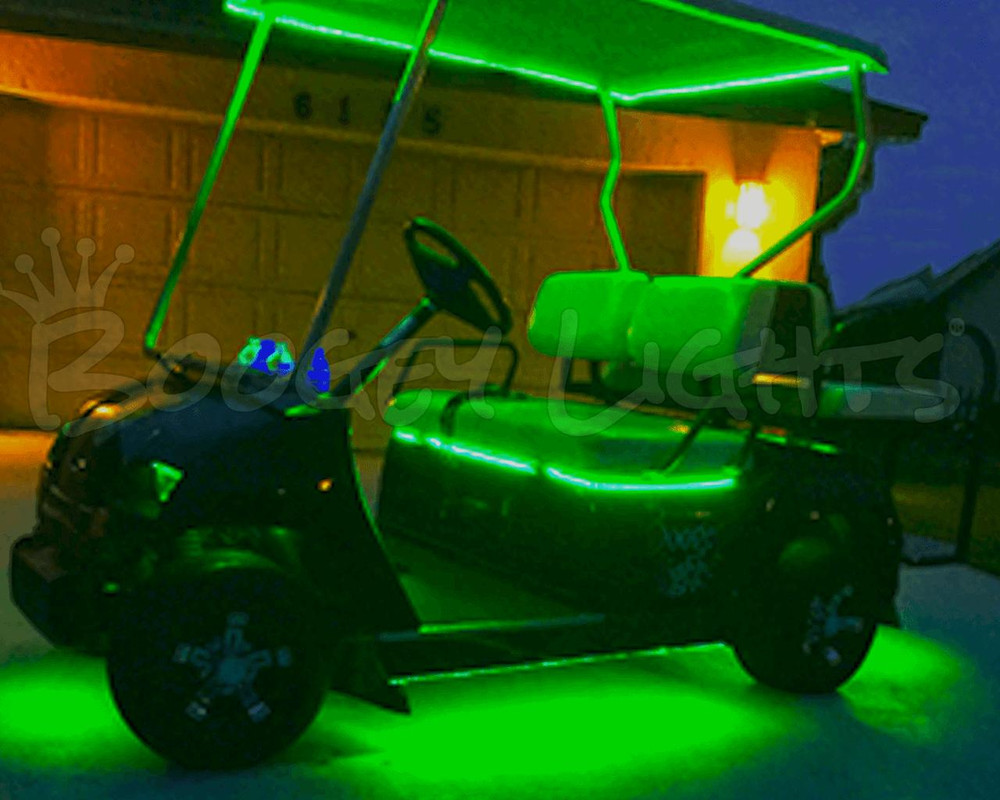
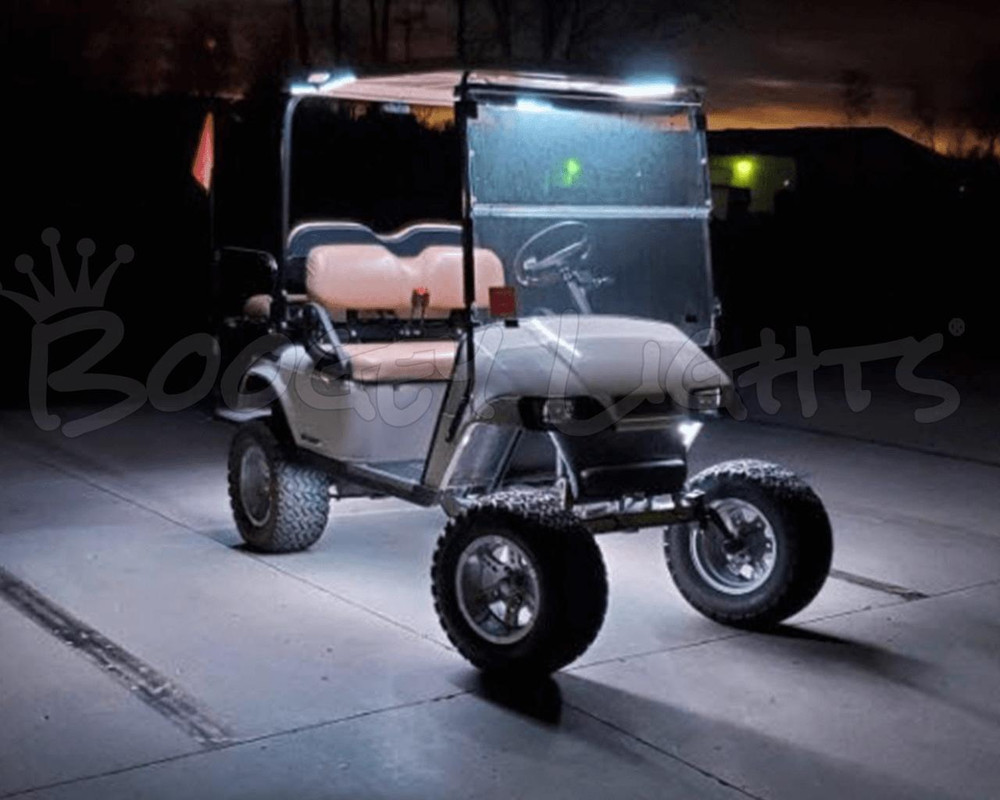
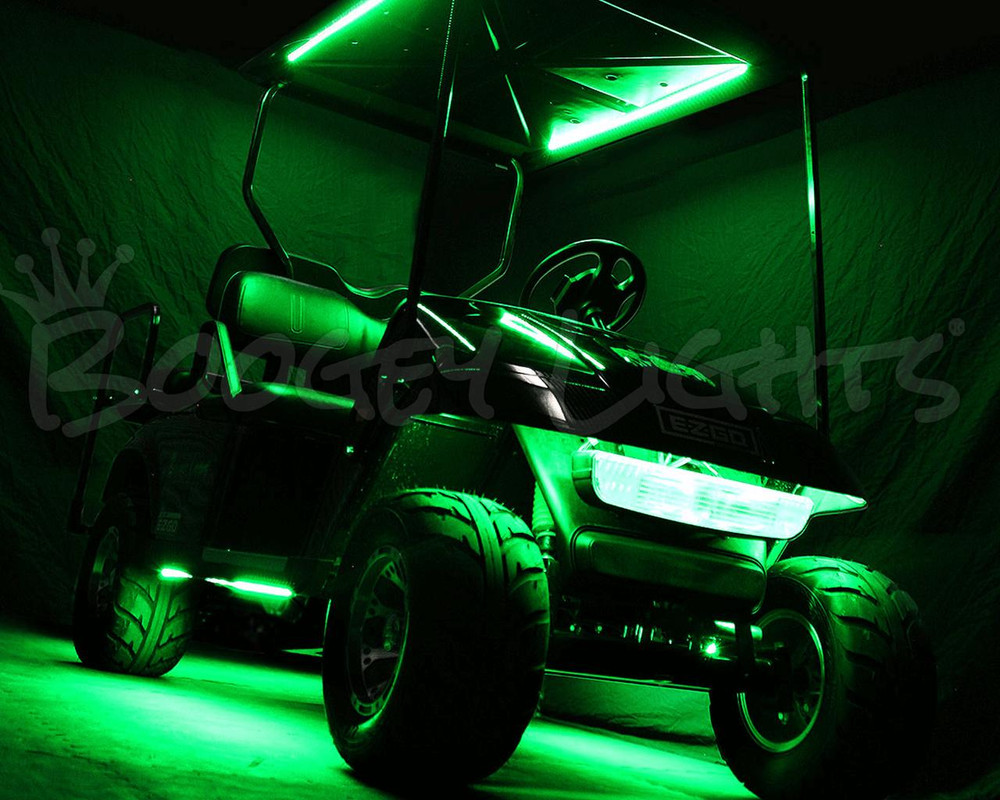
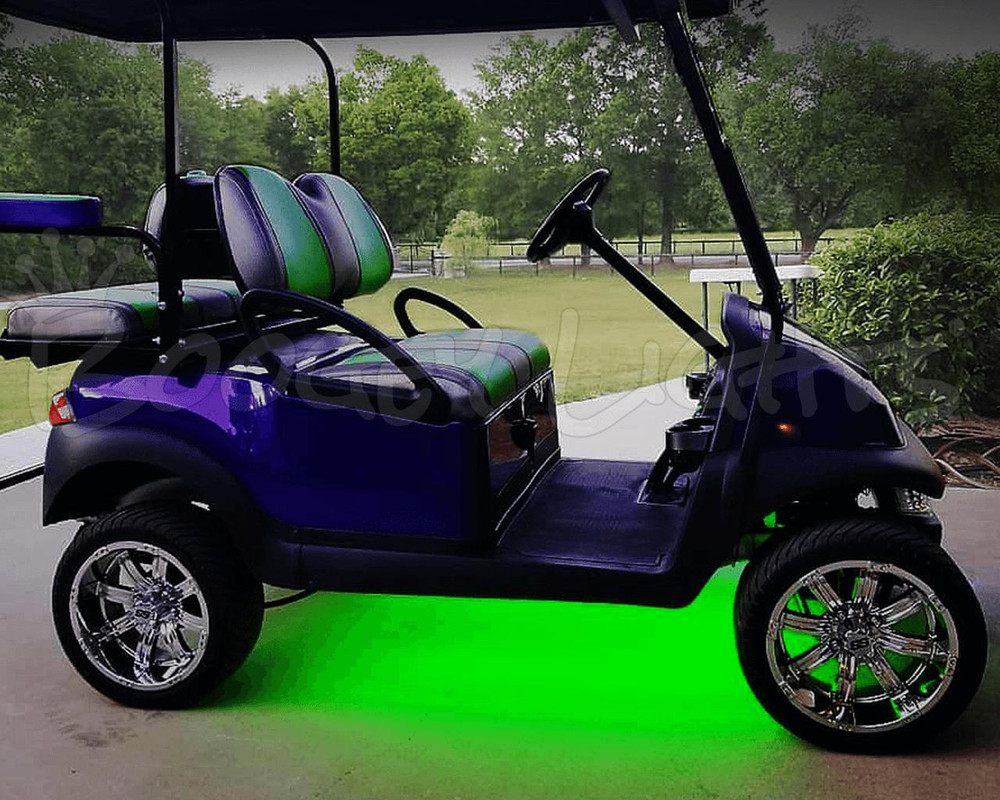
Golf Cart LED Light Kit
Light up your Golf Cart with a Boogey Lights® LED light kit!
We have updated our Golf Cart LED light kit to include our latest LED lighting products: RGBW and RGBA LED strips. In addition, there's now more flexibility to order the LED lengths that best fit your golf cart.
Designed specifically for outdoor use this Golf Cart LED light kit is incredibly bright. Our low profile hi-intensity LED strips are perfect for mounting underneath your golf cart as well as under the canopy. They produce a smooth, even glow of light to give it the custom look. With more LEDs per inch than any other LED light strip on the market, nothing is brighter!
PRODUCT HIGHLIGHTS
This kit can be configured to provide BASIC UNDER-GLOW (two sides: drivers and passengers), FULL-PERIMETER (two sides + front + rear) and under the canopy. The lengths of the LED strips too are highly configurable to fit any Golf Cart. The kit is available in single color (8 options) as well as multi-color RGB, RGBA and RGBW. These three multi-color RGB options are available with our latest GEN2 LED Controller which offers both Bluetooth and RF wireless control. These multi-color GEN2 controllers come in three capacity sizes: Super (900 max leds), HD Single Zone (1800 max leds) and HD Dual Zone (3000 max leds, 1500 per zone).
Input voltage is 12vdc that will work with both gasoline or battery powered electric motors utilizing 12v, 24v, 36v, 48v or 72v electric power (with optional voltage reducer). The INSTALL navigation tab on this product page provides significantly more detail on these wiring options.
LED light strips are constructed with 2 ounce copper PCB with 1.2mm of industrial strength 3M adhesive tape. 3M promoter included ensure these lights will stay stuck. LEDs are hi-intensity super-bright 5050 LEDs based on our low-profile surface mounted LED strips.
UNDER-GLOW WITH OPTIONAL CANOPY LIGHTS
The under-glow component of this LED light kit will light the area under your golf cart with any of seven different colors (multi-color version) and animate them with special effects using the included wireless RF hand held remote control. With our free Bluetooth APP and your smartphone, you can program the LED controller to display up to 16 million different colors (even more combinations with RGBA or RGBW). The Bluetooth APP navigation tab on this product page has significantly more detail on the Bluetooth control features.
The optional canopy component will light the canopy area on your golf cart. Before ordering however we urge customers to physically inspect their canopy. The canopy surface you install the LED strip to has to be rigid enough such that the canopy mounting surface doesn't flex. This is particularly important if your canopy is used as a handle when folks get in/out of the cart. Some golf cart canopies will even have a hand hold built into the structure of the canopy itself. If you mount the LED strip directly to the canopy and that canopy is used as a handle and/or has a handle built into it, the flexing of the canopy mounting surface will stress the LED strip causing it to prematurely fail - usually at the solder joint - which is not covered under warranty. The solution is to mount the canopy LED strips on some plastic or aluminum flat bar first. Then, mount that assembly to the canopy. Doing so isolates the LED strip from the canopy flexing surface. The CONFIG navigation tab on this product page has more detail on this issue and available options to resolve. Please read it.
SINGLE COLOR & MULTI-COLOR OPTIONS
The single color version of this kit can be wired directly into or off existing switch if desired; or, add a wireless on/off remote. The RGB/Multi-Color version requires an RGB LED controller to operate; make your selection from the drop down box above. The RGB LED Controllers offered are our new GEN2 (G2) RGBx RF + BLUETOOTH LED controllers which allows you to display up to 16 million different colors (RGB diodes) as well as control the Amber or White diodes on RGBA/RGBW LED strips. Both single zone and dual zone LED controllers are offered. See the CONFIG TAB for more detail on these controllers.
WHAT LENGTHS DO I NEED?
Good question. Honestly, we don't know. Before ordering we urge customers to take the time to carefully review the information presented here as well as the other the navigation tabs offered on this product page. Yes, we realize there is a lot of information to read. We wish it was simpler too. Unfortunately, it's the only way to make sure customers get the fit and look they want for their specific golf cart. These are not plug-n-play systems. Nor are they one size fits all. There are a lot of ways this LED light kit can be installed and configured; much of which depends on your personal preferences and your specific golf cart. There are no standards. Even the same makes/models can have different measurements and available mounting locations. For this reason we strongly suggest taking the time to first examine the bottom of your golf cart (and/or canopy if you want canopy lights) for the areas you want to light up and then, measure those available LED mounting locations. When taking those measurements it's important the LED strip be mounted flat against a single contiguous mounting surface and in a straight line (the led strip cannot bend around corners or be bent on a horizontal plane). The entire strip must be stuck to the mounting surface and not span across mounting surfaces. If you don't have a smooth, flat, contiguous mounting surface we suggest riveting or screwing 1.5" wide plastic or aluminum flat stock to the surface and then mount the LED strip to that flat stock. You'll find details about all of these options and issues on the CONFIG and INSTALL tab of this product page.
AVAILABLE OPTIONS
Light Kit Configuration: Select the type of LED strip and switch/controller combination you want from the drop down. See CONFIG tab for more details on these options.
KIT Version: Select from Basic Under-Glow, Full-Perimeter Under-Glow with or without Canopy Lights. See CONFIG tab for more details on these options.
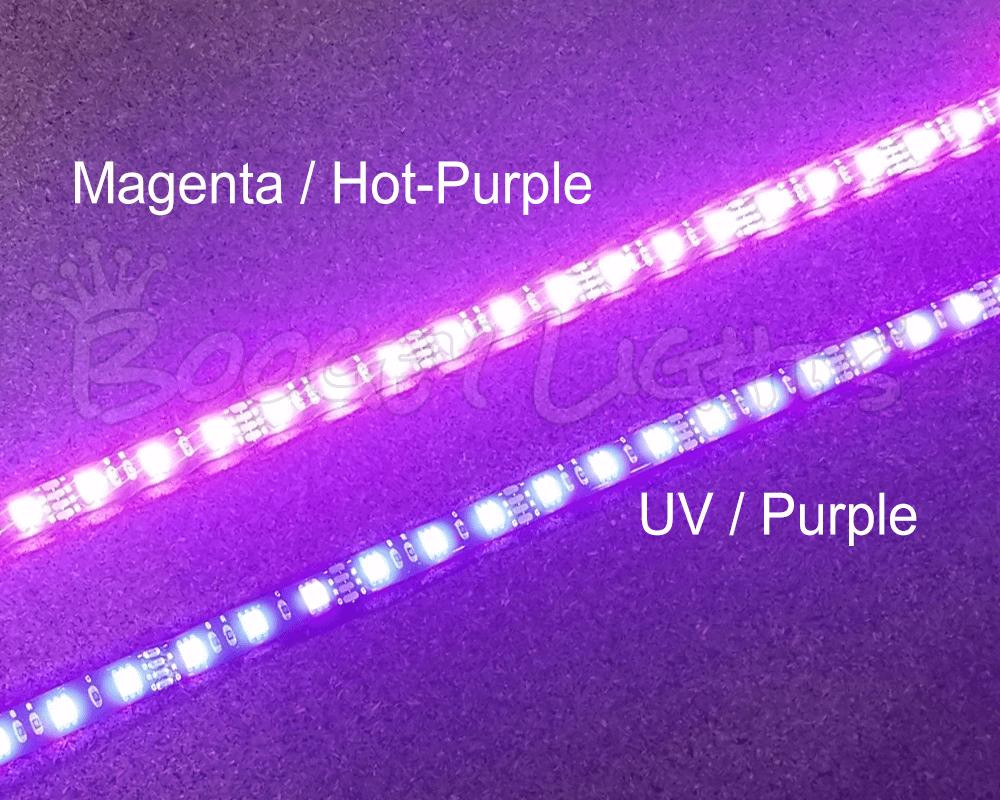
LED Color Options: Select the LED color you want from the drop down box. There are 8 possible color options (Red, Green, Blue, White, Orange, Amber, Pink and Magenta) and four multi-color options (RGB, RGBW, RGBA, RGBWW). Selecting the LED color option will adjust the available options you can select based on your color selection. See CONFIG tab for more detail on the multi-color options.
Under-Glow LED Lengths: Select the length of the LED strips you want for your Under-Glow LED strips. Note that the length options will vary based on the KIT VERSION you select above.
Canopy LED Lengths: Select the length of the LED strips you want for your Canopy LED strips. Note that the length options will vary based on the KIT VERSION you select above.
PCB Color: Select BLACK or WHITE PCB. Details on why this might be important to you are below. Not all LED colors are available in white PCB. For example, RGBW, RGBA and RGBWW are only available in Black PCB.
Optional - Add Voltage Reducer: Boogey Lights LED lighting systems are native 12vdc systems. As long as you have 12vdc power available, that's all you need. If however your cart is electric and you don't have a single 12vdc battery in the array, you can use the optional Voltage Reducer offered with this kit.
Optional - Add Extra 3M Adhesion Primer: All of our lighting kits come with 3M adhesion primer sufficient to do the installation. Some folks however prefer to order extra; just in case.
COLOR OPTION CONSIDERATIONS
This light kit is offered in eight single color options and in four multi-color configurations: RGB, RGBW (RGB + warm white) and RGBA (RGB + amber). For the single color options the LED controller wireless RF remote will give you the ability to turn the LEDs on/off as well as dim, flash, strobe and breath (and change the speed at which those features work). With the bluetooth APP, you can perform these same functions as well as save presets. For the multi-color options, you have the same capabilities however the feature set is significantly expanded since you also have the ability to change/adjust/tweak the colors you want to display. With the included RF wireless remote you can change between 7 pre-set colors (Red, Green, Blue, White, Light Blue, Lime Green/Yellow, Hot Pink/Purple) and functions of on/off, blending, strobing, breathing, flashing, fading and dimming. You can also use your Bluetooth enabled smart phone to create a custom look. The Bluetooth APP allows you to program the RGB diodes of any of our RGB, RGBW, and RGBA LED strips with over 16 million different color combinations plus three pre-sets. Also, the Bluetooth APP offers 2 and 3 color rotation programming. Click the APP navigation tab on this product page for significantly more information on both the Bluetooth capabilities and APP functionality (including a video showing how the Bluetooth APP works). All three RGBx GEN2 controllers offered will power and control any of the RGBx LED strips offered.
BRAKE FLASH / QUICK SWITCH FEATURE
With our GEN2 series RGBx BLUETOOTH + RF LED controllers we include BRAKE FLASH (aka QUICK SWITCH) circuit integration. With this feature the LED controller can be wired such that when the brake flash circuit is energized with 12vdc power, the LED controller immediately lights up just the LEDs wired to the RED power lead output coming from the LED controller. The idea is that when the brake pedal is pressed on the vehicle, all the red leds (or whatever color LED you have wired to the red output) will light up. This is a popular safety option designed specifically for small format vehicles such as motorcycles and golf carts. It can also be used with RGBA or RGBW leds such that when 12vdc power is applied to the Quick Switch input, only the Amber (or Warm White) diodes light up. Note that this feature does not have to be used. If you don't want to use the brake flash circuit, simply cap the brake flash input wire on the controller and forget about it. This feature is included with all GEN2 SUPER and HEAVY DUTY LED controllers.
WHAT IS RGBW?
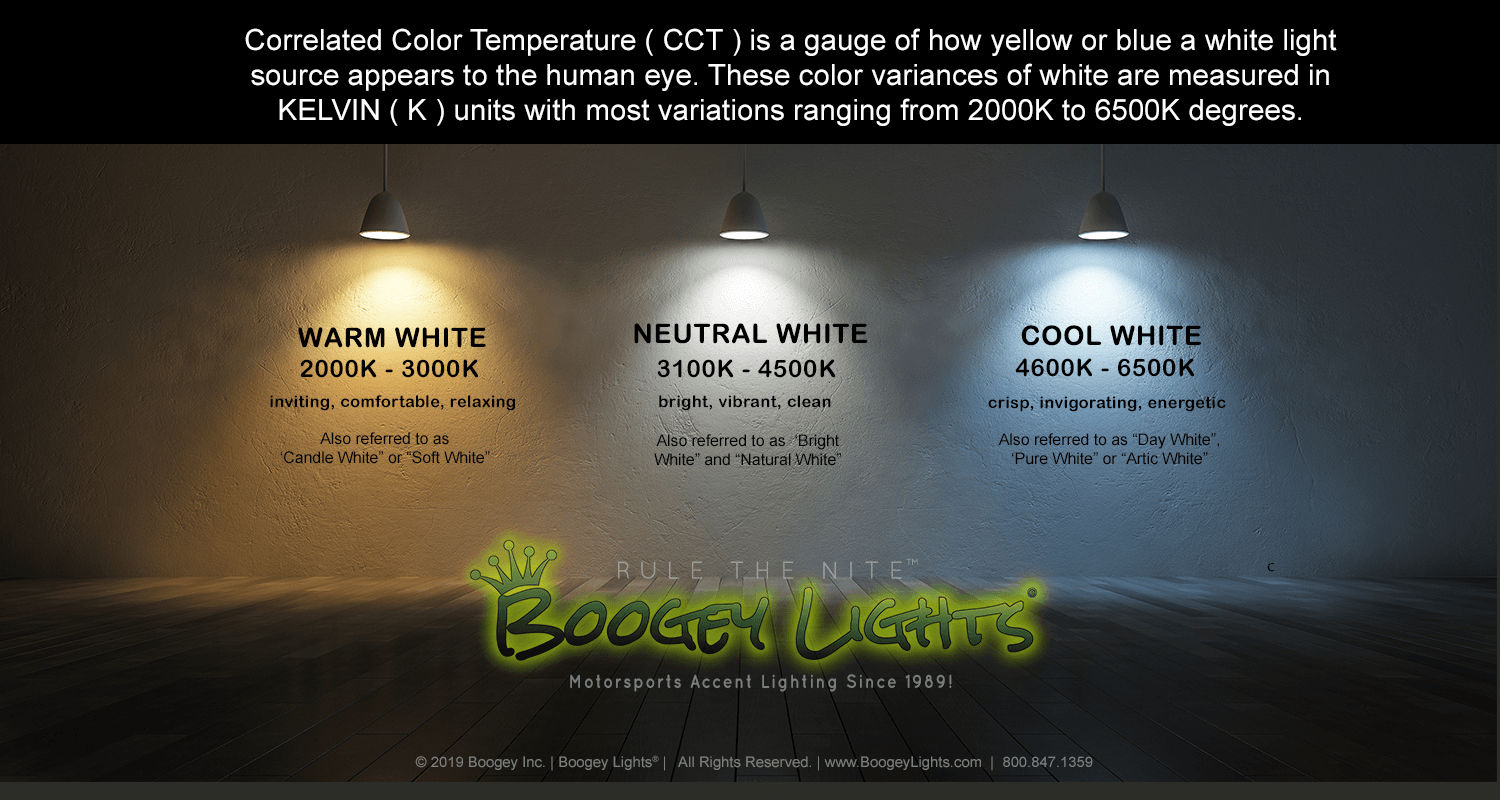
On the RGBW led strip, in addition to RGB, you get one extra diode which is Warm White. That warm white diode has a Kelvin temperature of 2400 which means it has a yellowish look giving it a warmer, softer, candle like look (see photo below). That fourth diode on the RGBW led strip is often wired to simple ON/OFF switch OR zone 2 of our Dual Zone LED controller. See the CONFIG tab on this product page for more details on this option.
WHAT IS RGBA?
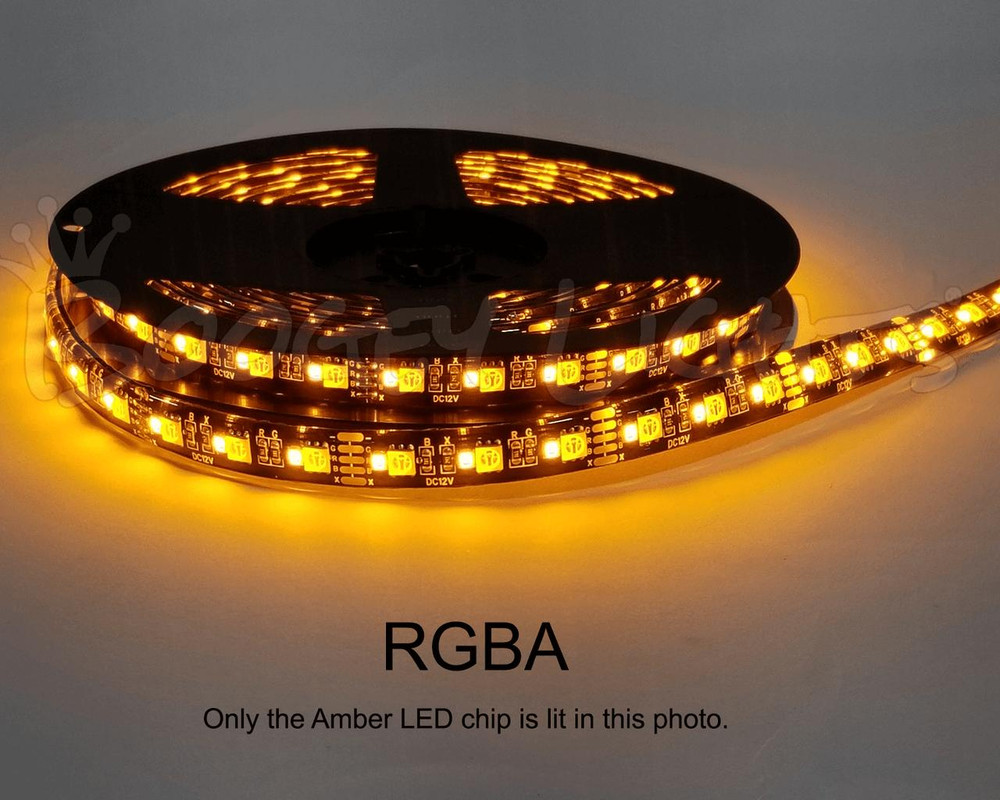
On the RGBA led strip, in addition to RGB, you get one extra diode which is AMBER. That fourth diode on the RGBA led strip is often wired to a simple ON/OFF switch or zone 2 of our Dual Zone LED controller. See the CONFIG tab on this product page for more details on this option.
PCB. WHY THE COLOR MATTERS.
This option is relevant only to the optional Canopy Lights. LEDs are mounted to a Printed Circuit Board (or PCB for short). The color of that PCB makes a difference in how the finished installation looks in the daylight. Most (but not all) of our LED light strips come in two versions to match the surface the strip will be attached to. For Golf Cart kits, the only time the PCB color will matter is for mounting under the canopy. If you are adding canopy lights and you have a light colored canopy, you will probably want to order the WHITE PCB light strip. If you have a dark colored canopy, you will probably want to order the BLACK PCB light strip. Note: All Under-Glow LED strips use black PCB.
NEED MORE LIGHTS?
This Golf Cart LED light kit is based on our popular LOW PROFILE LED strips. They're IP65 rated and built tough for outdoor applications. If you want to add more lights to your cart than what this kit provides, you have a couple of options. First, we offer these ADD-ON LED LIGHT STRIPS with power lead that can be purchased in one foot increments. Second, you can purchase our LOW PROFILE LED strips in lengths ranging from 2 inches to 16 feet. Either option will work. Just have to make sure you're not exceeding the rated capacity of the LED controller (assuming you have multi-color LEDs).
USING THE QUICK-SWITCH FEATURE
The Quick Switch feature is available on our GEN2 SUPER, HD SINGLE ZONE and HD DUAL ZONE LED Controllers. Whatever color LED you have connected to the GREY output wire of the GEN2 Controller is the color that will display when the Quick Switch is triggered with 12vdc +. The most common use for this configuration is with commercial vehicles who want to be able to instantly turn off whatever color they're running and turn on a DOT compliant AMBER which is on our RGBA LED strips. For these installations, the yellow trigger wire is connected to a toggle switch or other wireless switch that activates the AMBER leds. This feature however can be used with other vehicles too such as RVs and Golf Carts. In these cases that yellow trigger wire is connected to a toggle switch that turns on the White or Amber diodes. When the Quick Switch trigger wire is not energized, the LED controller operates the RGBxx diodes normally.
OTHER ITEMS YOU MAY NEED
No two installation scenarios are the same. Not everyone shares the same installation quality goals. Some folks are OK with twisting wires together, others want to solder them. Some folks are OK with running wires where they may be seen or unprotected to save money/time, others want a tidy, clean install without any wires showing. Some folks are OK with mounting their LED strips to whatever surface they can find, others want to take the time necessary to build out appropriate mounting surfaces to provide the best lighting effect on their vehicle. The point is it's not possible to provide all the materials necessary for all installation scenarios and quality goals. Our light kits provide the essential components needed for a high-quality, functioning lighting system. Installation of our light kit to your specific vehicle may however require additional items to make it look and fit the way you want. This is particularly the case with electrical wiring and mounting of LED strips. Before proceeding with your installation we suggest you consider THESE OTHER ITEMS.
Will Boogey Lights® Work with Other Brands?
The short answer is probably not. All Boogey Lights® RGB LED strips are COMMON CATHODE LEDS. They share a common ground and will only work with positively switched controllers. Most LED strips on the market today are COMMON ANODE because the controller technology used to power them is less expensive to manufacture. However they're not nearly as bright and are an overall inferior design when compared with COMMON CATHODE LEDs. For more information, click the button below.
THE KELVIN SCALE
Scroll down and expand each of the text groups.
LIGHT KIT CONFIGURATION
Single-Color Lighting configurations
- No Switch (default). Lights will need to be wired into a switch of some type (switch not provcided). Make sure the circuit you're connecting to is capable of handling the amperage draw. This option is for Single Color LEDs only.
- Wireless RF ON/OFF with Key Fob. A simple wireless ON/OFF remote with 2 handheld remotes and 30 amp relay. The wireless ON/OFF remote is capable of switching a maximum of 5 amps however we include the 30amp relay as some of the light configurations here will draw more than 5amps. We suggest using the 30 amp relay in the wiring circuit regardless. This ON/OFF remote measures 2-1/2" x 1-3/4" x 7/8". Single Color LEDs only.
- Wireless RF ON/OFF/DIM/STROB max capacity 300 LEDs (5 amps). This option is offered with our compact KEYFOB wireless remote. See photo in the product carousel. This controller is step up from the ON/OFF wireless remote that gives you the ability to also dim and strob the LEDs. This controller measures 2-1/2" x 1-3/4" x 7/8". 5 amps maximum which is about 300 LEDs. Make sure you aren't exceeding that capacity. The SPECs navigation tab on this product page has a break down of amperages based on both the number of LEDs and color being displayed.
- Wireless RF ON/OFF/DIM/STROB max capacity 900 LEDs (10 amps). This option is offered with our G2 M7 wireless remote. See photo in the product carousel. While this controller is our GEN2 Super multi-color RGBx controller, it can be configured to be used with Single Color leds as well. This controller measures 4-1/4" x 2-1/4" x 7/8". 10 amps maximum capacity which is about 900 LEDs. Make sure you aren't exceeding that capacity. The SPECs navigation tab on this product page has a break down of amperages based on both the number of LEDs and color being displayed.
The three Combo RF + Bluetooth LED controllers offered on this product are our latest GEN 2 LED controller series released in June of 2023. They have both RF Wireless and Bluetooth control built in (that's why we refer to them as 'COMBO' controllers - they'll do both). The RF wireless remote included with the controller uses our new G2 M7 TV style remote with 15 buttons which will operate RGB, RGBA, RGBW and RGBWW LEDs. The product carousel photos provide a more detailed view of this new G2 M7 remote. The Bluetooth component requires using our GEN2 APP which you can download for free and run it on your smartphone. More details about this new GEN2 LED controller are below. We offer three GEN2 RGBx LED controllers for this product as follows:
- GEN2 SUPER 900: This controller is most commonly purchased for Golf Cart lights. Installing more than 900 LEDs on a golf cart takes some doing -- although it can be done. For most people, this is the default LED controller needed for Multi-Color kits.
- GEN2 HEAVY DUTY 1800: This controller is our Single Zone Heavy Duty controller. It will handle up to 1800 LEDs. It's a step up from our SUPER version.
- GEN2 HEAVY DUTY 3000 / DUAL ZONE: This controller is a dual zone controller which simply means you can wire LEDs to two separate zones and control them individually (or together) using this controller. Maximum capacity per zone is 1500 LEDs. Some golf cart owners prefer this controller because of the dual zone capability.
For all GEN2 RF + Bluetooth COMBO LED Controllers, the RF wireless remote included with the controller allows you to select these 7 pre-set colors for the RGB diodes: Red, Green, Blue, White (6000 Kelvin), Light Blue, Boogey Lights Green (Neon Green/Yellow), Hot Pink/Purple. In addition to selecting these 7 colors, there are 5 different functions you can use as follows: on/off, dimming, strobing/flashing, blending and breathing. For the strobing, flashing, blending and breathing functions you can adjust the speed of these features too using the RF hand held remote. In addition, if you have RGBx or RGBxx LEDs, the RF handheld wireless remote can also control the additional one or two 'X' diodes allowing you to turn them on/off, dim, adjust brightness and mix. If you have a Dual Zone controller, the RF hand held remote will allow you to operate Zone 1, Zone 2 or both Zone 1 + 2 together. Quick Switch feature included. Click on the CONTROLLER navigation tab of this product for more information on the GEN2 controller.
In addition to the RF hand held remote, you can use your Bluetooth enabled smart phone to create a custom look using our free APP and the LED controller. The Bluetooth APP allows you to program the RGB diodes with up to 16 million different color combinations plus three pre-sets. With the G2 version, you can also control the X diodes using your Bluetooth phone which provides additional color combinations. In addition, the Bluetooth APP offers both 2 and 3 color rotation programming to create some very cool effects. With the G2 version, you also get a Time of Day timer and a Countdown Timer. You can read more about these advanced features by clicking on the GEN2 APP button below.
KIT VERSIONS
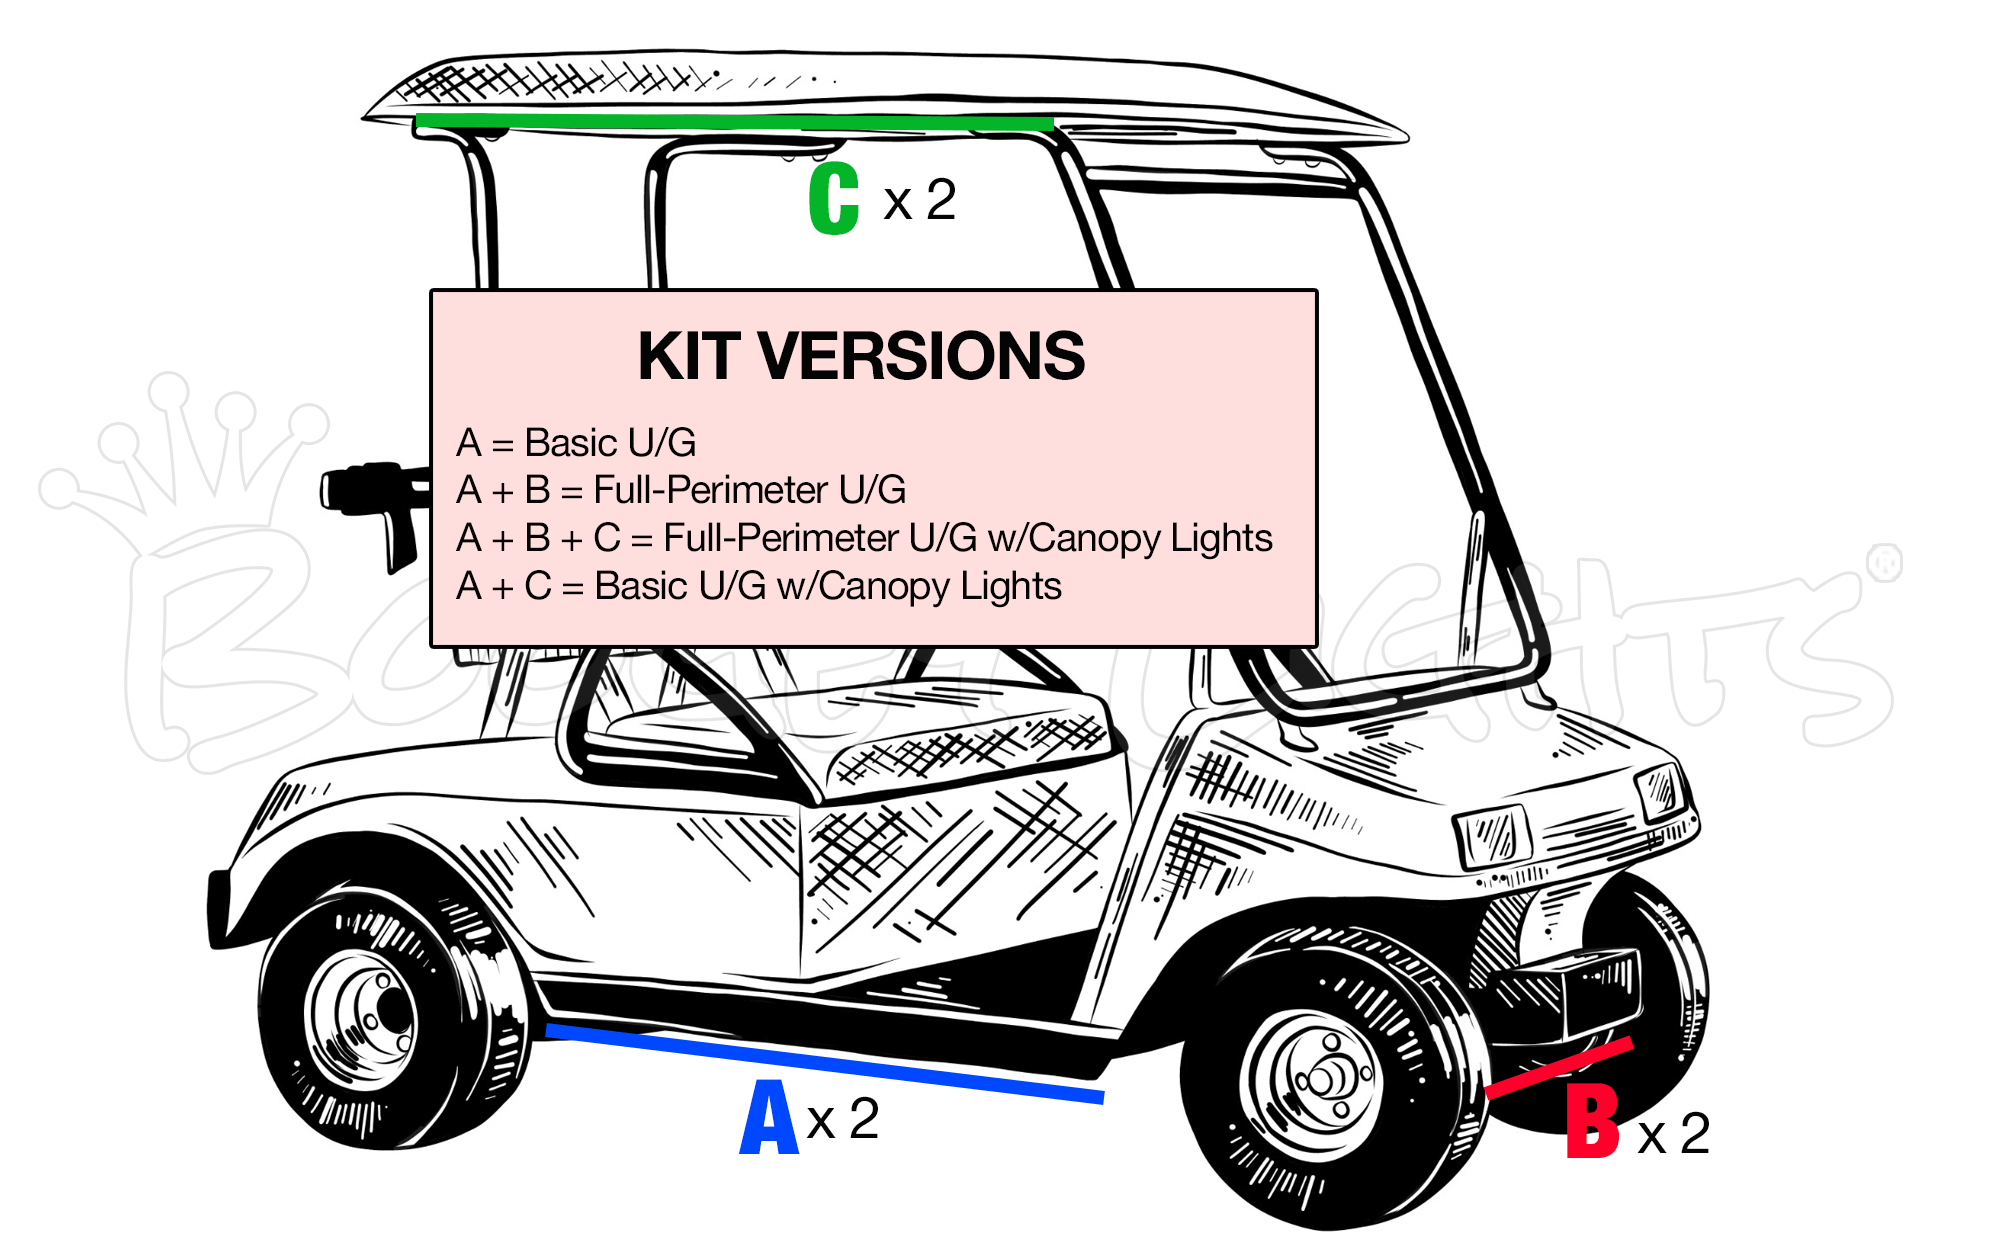
This light kit is offered in the following four configurations:
- Basic Under-Glow w/o Canopy Lights
- Basic Under-Glow with Canopy Lights
- Full-Perimeter Under-Glow w/o Canopy Lights
- Full-Perimeter Under-Glow with Canopy Lights.
We have included a diagram below showing the approximate placement of each kit version.
(A) Basic Under-Glow: This version has two LED strips, one mounted on each side of the cart shining downward. One on the driver's side. One on the passenger's side.
(B) Full-Perimeter Under-Glow: This version has four LED strips, one mounted on each side of the cart plus one under the front and one under the rear. The idea is to provide full-perimeter lighting under the cart.
(C) Canopy Lighting: Offered as an option on both the Basic and Full-Perimeter Under-Glow kits, canopy lighting includes 2 LED light strips designed to mount on the botton of the golf cart canopy shining downward.
See diagram below. Making your kit version selection will determine which LED lengths that are available to be ordered in the configuration options that follow.

LED COLOR OPTIONS
This light kit is offered in eight single color options and in the following multi-color configurations: RGB, RGBW (RGB + warm white) and RGBA (RGB + amber). Single color simply means the LED strip is one color all the time. The color cannot be changed. The color you choose is the color you get. Multi-color means you can change or select different colors. All of the multi-color RGB options require an LED controller to operate. The advantage of RGB over a single color LED strip is that RGB gives you the ability to change colors as well as access other features. With the bluetooth interface, you can save favorite color/feature sets as well as program 2 or 3 color rotation sequences. More detail about these advanced features can be found on BLUETOOTH APP tab of this product page. With RGB you can choose between 7 (using the hand held wireless remote) and 16 million (using the bluetooth APP) different color combinations. RGBW includes all of the RGB colors and capabilities plus the addition of a warm white diode (2400 kelvin temp). Warm white is often referred to as a 'candle white' or 'soft white'. It has a yellowish tint to it and for many, is a more pleasant color of white than the bright white color that is displayed by mixing RGB leds. RGBA includes all of the RGB colors and capabilities plus the addition of an amber diode. Amber attracts fewer bugs than white. It's also not nearly as bright; easier on the eye at night which some folks prefer. Plus, with RGBA you can turn on just the RED diode of the RGB and when added with AMBER, provides a nice looking orange color; something many people enjoy. Note: Orange is not a color you can mix with just RGB so if orange is a color you want, we suggest ordering RGBA. See photo in the product images carousel of this product for an example of what the RGBA orange looks like. Make your selection from the LED COLOR OPTION drop down.
UNDER-GLOW LED LENGTHS
The Under-Glow LED strips for this kit can be purchased in lengths ranging from 3' to 8' for the two sides and 2', 3' or 4' for the front/rear. If your KIT VERSION selection is set to 'Basic Under-Glow', make your U/G length selection from one of the first 8 options in the drop down menu. The Basic U/G kit has 2 LED strips, one on the bottom of each side of the cart. If your KIT VERSION selection is set to 'Full Perimeter U/G', you have more options to choose from since you'll need to choose both the two sides lengths (3' to 8") as well as the lengths of the front and rear LED strips (2', 3' or 4'). While we urge customers to physically inspect and measure the available mounting space on the bottom of their golf cart before ordering, generally speaking, here are the most common combinations for golf cart under-glow systems:
- 4 Seat Golf Carts: 3' or 4' LED strips
- 6 Seat Golf Carts: 4' or 5' LED strips
Note: Most 2 seat golf carts use the same body structure as a 4 seat golf cart just without the seats facing toward the rear.
CANOPY LEDS
The Canopy LED strip lengths for this kit can be purchased in lengths ranging from 3' to 8'. Make your selection from the options listed in the drop down box. We urge customers to physically inspect and measure the available mounting space on the bottom of the canopy before ordering. The canopy surface you install the LED strip to has to be rigid enough such that the canopy mounting surface doesn't flex. Note too the canopy LED strip is intended to be mounted to the canopy roof facing downward. Do not mount it on the side of the canopy facing inward. This is particularly important if your canopy is often used as a handle (or, has a handle built into it) when folks get in/out of the cart. Any flexing of the canopy mounting surface – particularly lateral flexing ‐ will stress the LED strip causing it to prematurely fail (usually at the solder joint) which is not covered under warranty. The solution is to mount the canopy LED strips on some plastic or aluminum flat bar first. Then, mount that assemply to the canopy. We offer these mounting surface options on our website however you can usually find them cheaper locally -- especially when shipping costs are added. See installation docs which you can download directly from this product page.
When Canopy lights are ordered, we include a simple push-button on/off switch that can be installed between the LED controller ground wire and the Canopy LED lights only. This gives you the abilty to turn off just the canopy lights while still having the under-glow lights on. This is particularly useful if you're using your cart at night and need to be able to turn off the canopy lights only while having the under-glow lights on.
Note: A typical 4 seat golf cart canopy LED length is 4'. The typical 6 seat golf cart canopy LED length is 6'. The LEDs can be cut every 3 LEDs if needed. The Canopy LED option includes a push-button switch to allow you to turn the canopy off while still operating the under-glow.
VOLTAGE REDUCER OPTION
If you have an electric cart you may (or may not) need one of these. It reduces 48/60/72vdc to 12vdc voltage. It's ideal for electric golf carts that want to run 12vdc devices. Also referred to as a Step Down (Buck) Voltage Regulator. Measures 3.5" x 4.2" x 1.9". This converter works with any battery packs of working voltage ranging from 48 volt dc to 72 volt dc; NOT higher or lower. The input voltage is preset from manufacture and it is non-adjustable. Input Voltage: 48vdc to 72vdc. Output Voltage: 12vdc. Amps: Max amperage is 20amps. The INSTALL navigation tab on this product page has more information on how to determine if you need a voltage reducer or not for your cart. More information about this particular voltage reducer can be found here: VOLTAGE REDUCER . Note: We do not manufacture this voltage reducer. We offer it solely as a convenience to customers. You can find voltage reducers online elsewhere for less.
Installation Information & Tips
IMPORTANT. You must have an understanding of 12vdc power. An essential skill with installation of any Boogey Lights LED products is knowing how to correctly wire the product to a 12vdc circuit. This includes understanding the importance of having a properly sized fuse at the power source, polarity, how to properly seal an electrical connection, using properly sized wire gauge for the load, measuring voltage and measuring the additional amperage draw you're adding. If you are uncertain or unfamiliar with any of these concepts, we urge you to ask someone who has the knowledge to assist you. Electricity is unforgiving.
Installation Documentation
The installation documentation for our products is quite detailed. You can download the installation documentation (along with how-to info, operating information and wiring diagrams) directly from this product page before purchasing so you know exactly what's involved. To do so, simply click on the INSTALL DOCS button that appears below the product photo gallery. A menu will pop-up from which you can make your download selection. All product documentation can be downloaded from our website. Yes, there's a lot of reading but if you want your Boogey Lights® light to last for years it's important to take the time to read the installation documentation and follow our installation instructions. We promise you will not be disappointed.
INSTALLATATION: GAS VS ELECTRIC
BOOGEY LIGHTS® are 12vdc devices only. Golf carts run on gasoline or battery powered electric motors utilizing 12v, 24v, 36v, 48v or 72v electric power. To operate our lights, you will need 12vdc power. We strongly suggest using a volt meter to test your power source is indeed 12vdc before making any connections. This is especially important if you have an electric golf cart. Do not assume the power source is 12vdc without testing it first. If you are not familiar with how to do this we suggest asking someone who is to assist you with the installation. Connecting a 12vdc device to a 48vdc power source will permanently damage the 12vdc device and potentially cause other electrical problems. Electricity is unforgiving in this way. Using a volt meter to test the voltages takes a few extra minutes but doing so greatly increases the odds you're doing it right the first time. There are no second chances when it comes to electricity.
Gasoline Powered Golf Carts
Most gas carts use a single 12v battery to start the engine. Power our lights from the positive and negative post on your 12v starting battery (you may want to add a cut-off switch such that when your cart is sitting, you can easily cut the power going to the LED Controller so it isn't always powered up). If your cart has a 12vdc accessory port, you may be able to use that but do not assume that accessory port can handle the amperage of the lights you're adding. Double check the amperage rating of that 12vdc accessory port before using it to power your lights.
Electric Golf Carts
There are a wide variety of electric golf carts on the market today. They range in voltages from 24v all the way up to 72v. Many of these carts will already have a 12vdc power shunt so customers can power their 12vdc devices. If you're going to use this as a power source for your light kit, just make sure the amperage rating for that 12vdc power shunt will handle the additional amperage you're adding with your light system. If your cart doesn't have a 12vdc power shunt available, you have a couple of options:
- Depending on the battery configuration of your cart, you may be able to pull 12vdc power from one or more batteries in the battery bank of your cart. For example, if your cart is 36v, that 36v is often made up of six 6vdc batteries. You can pull 12vdc by using two of those 6vdc batteries in series. See below for additional combinations.
- If your cart's battery bank doesn't have a combination of batteries that allow you to pull 12vdc from them (e.g. 48v cart with six 8v batteries), the solution is to purchase a voltage reducer. There are a number of commercially available voltage reducers on the market that will take 48vdc - 72vdc input and output 12v. We offer a voltage reducer here but you can purchase them online too. The only thing to be aware of is the amperage rating to match that of your light kit.
Common Battery Voltage Combinations
- 24v Electric Golf Carts: Most 24v carts use a combination of four (4) 6v batteries to achieve 24v. 12vdc can be pulled from the positive post on one 6v battery and the negative post from another 6v battery in series.
- 36v Electric Golf Carts: Most 36v carts use a combination of six (6) 6v batteries to achieve 36v. 12vdc can be pulled from the positive post on one 6v battery and the negative post from another 6v battery in series.
- 48v Electric Golf Carts: Many 48v carts use a combination of 12v batteries. If this describes your cart then just use the positive and negative from one battery. There are some brands that will use a combination of six (6) 8v batteries to achieve 48v. In this situation you will need a voltage reducer to step the power down to 12v. See optional Voltage Reducer offered with this kit.
- 48v-72v Electric Golf Carts: If you don't have a single 12vdc battery in the array, you can use the optional Voltage Reducer offered with this kit.
Note: Be aware that pulling 12vdc power from a subset of the batteries in your battery bank is not ideal in terms of power utilization. This is because the load on that subset of batteries will always be greater than the load on other batteries in the entire bank. The batteries with the higher load will wear out sooner because they are discharging more often. For many customers it doesn't matter however if you're concerned about this imbalanced draw, even if your cart's battery bank has a combination of 12vdc power available, use the voltage reducer. That way you will be pulling power from the entire bank of batteries and not just a couple of them. If you're unsure or confused about any of these electrical issues, please seek installation assistance from someone who does. Our installation instructions assume the installer is comfortable with DC power and understands the issues presented here.
INSTALLATION NOTES
- WE STRONGLY SUGGEST BENCH TESTING YOUR LIGHTS AND CONTROLLER BEFORE MOUNTING! We cannot emphasize this enough. Probably 95% of all calls we receive from customers are about problems or issues that could have easily been avoided had the customer taken the extra 15 minutes to bench test their lighting setup before installation. Not only does bench testing give you an opportunity to understand the configuration, it also will flush out any problems or misunderstanding about the product and use before mounting.
- 3M Adhesion Primer. We provide small bottles of 3M Adhesion Promoter for our kits. All you need is a shop rag, sponge or towel of some kind to apply the promoter to the surface. Once you paint on the promoter you have at least an hour to mount the light strip although we recommend proceeding immediately after painting the surface with the 3M Promoter. Details on how to prepare the mounting surface are contained in the light kit.
- Install the Under-Glow Kit under each side of the cart (and front and rear if you ordered the full perimeter kit). The LED strips need If you need to cut the strip to fit you can. Just make sure you cut where marked and then seal the end of the LED strip with silicone or similiar. If your measurements are correct though you shouldn't have to cut the LED strip. Keep in mind too that the LED strip MUST be mounted flat against a single contiguous mounting surface, in a straight line. Really important the entire strip be stuck to the mounting surface and that you NOT attempt to span across mounting surfaces. If you do, the strip will almost certainly fail in the spot that isn't affixed firmly to the mounting surface (or, the point at which is spans across the two mounting surfaces). If you don't have a smooth, flat, contiguous mounting surface we recommend riveting (or screwing) 1.5" wide plastic flat bar or aluminum flat stock to the surface and then mount the LED strip to that flat stock. This flat bar can be purchased at just about any home improvement store or, we offer it for sale online too. Also, do not attempt to mount the strip to follow a radius. The LED strip has to be mounted in a straight line and flat.
- If you purchased the Canopy LED light kit, we include a push-button on/off button to allow you to turn off the Canopy lights if you wish while still keeping the Under-Glow lights on. Wiring diagram is included in the kit (and can be downloaded from our website too). NOTE: The canopy surface you install the LED strip to has to be rigid enough such that the canopy mounting surface doesn't flex. Note too the canopy LED strip is intended to be mounted to the canopy roof facing downward. Do not mount it on the side of the canopy facing inward. This is particularly important if your canopy is often used as a handle (or, has a handle built into it) when folks get in/out of the cart. Any flexing of the canopy mounting surface – particularly lateral flexing ‐ will stress the LED strip causing it to prematurely fail (usually at the solder joint) which is not covered under warranty. If your canopy flexes, be sure to build out the mounting surface first with some plastic or aluminum flat bar (same as what we describe for the Under-Glow).
- Make sure you know where you're going to make your electrical connection to the golf cart. In most golf cart installs, the LED controller or switch will be installed under the seat in the engine/battery compartment. The connection to the battery must be fused. Some carts already have a 12vdc power shunt. Others will need to go directly to the 12vdc power source. If you're unfamiliar with 12vdc power, we suggest asking someone who does to assist you with the installation.
Need additional assistance? Give us a call and we'll be happy to assist!


